Abstraction
Paper experimentation
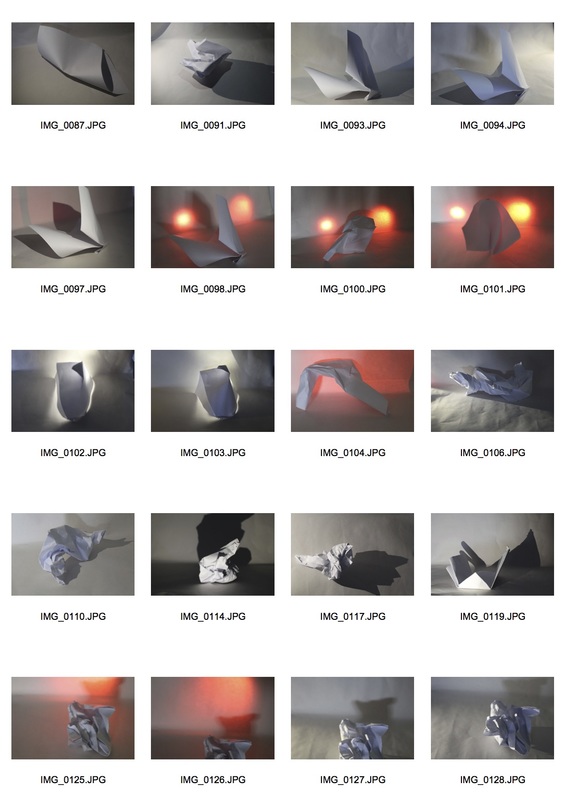
For this test we were initially provided a single piece of A4 plain paper and instructed to take abstract photos of said paper, we could fold the paper and use various lighting methods. After taking at least 24 shots of the single piece of plain paper, we were allowed to experiment with coloured filters, and multiple pieces of coloured tissue paper. I aimed to focus on shape and shadows, with the plain paper and later switched to a more colour based focus, when allowed use of filters and tissue paper.
Development
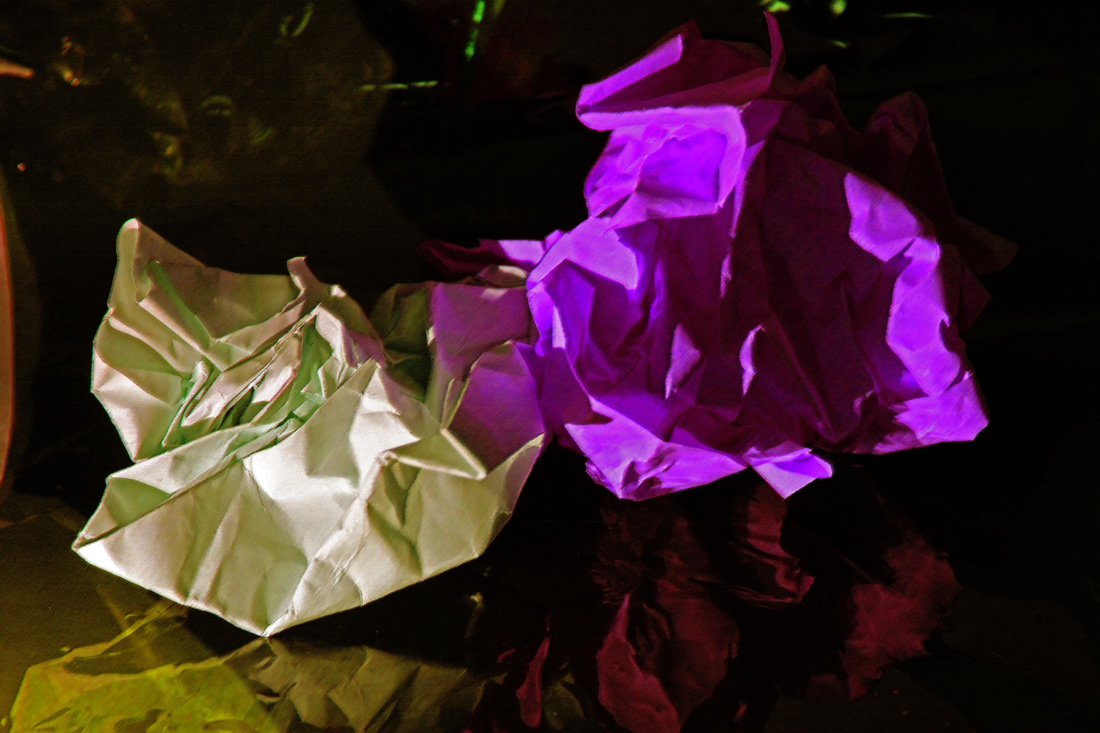
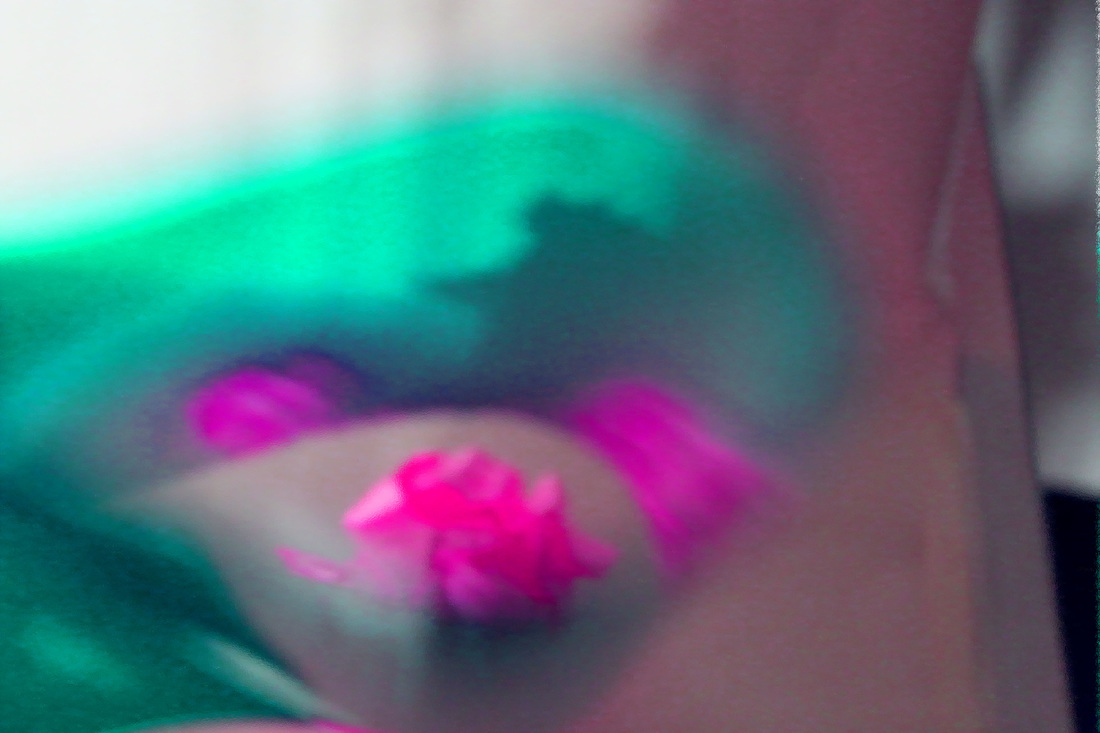
I further developed two shots by altering them on photoshop. Both edits came from my more experimental pictures, utilising multiple pieces of coloured paper and reflective surfaces. I changed the saturation and contrast in both pictures to bring out the colours and the contrast between them in either photo. In the first shot I changed the colour palette to shift the pink tissue paper to a darker purple hue, I then altered the white paper, making it more yellowish to compliment the purple of the other paper. Finally I darkened the overall image to make the colours and their reflections stand out further. The second image was of the pink tissue paper shot down a folded piece of blue filter plastic. I then colour shifted the image in photoshop, increasing the cyan and pink tones, I also added a blur filter to give the shot a sense of motion.
Second Task
Original
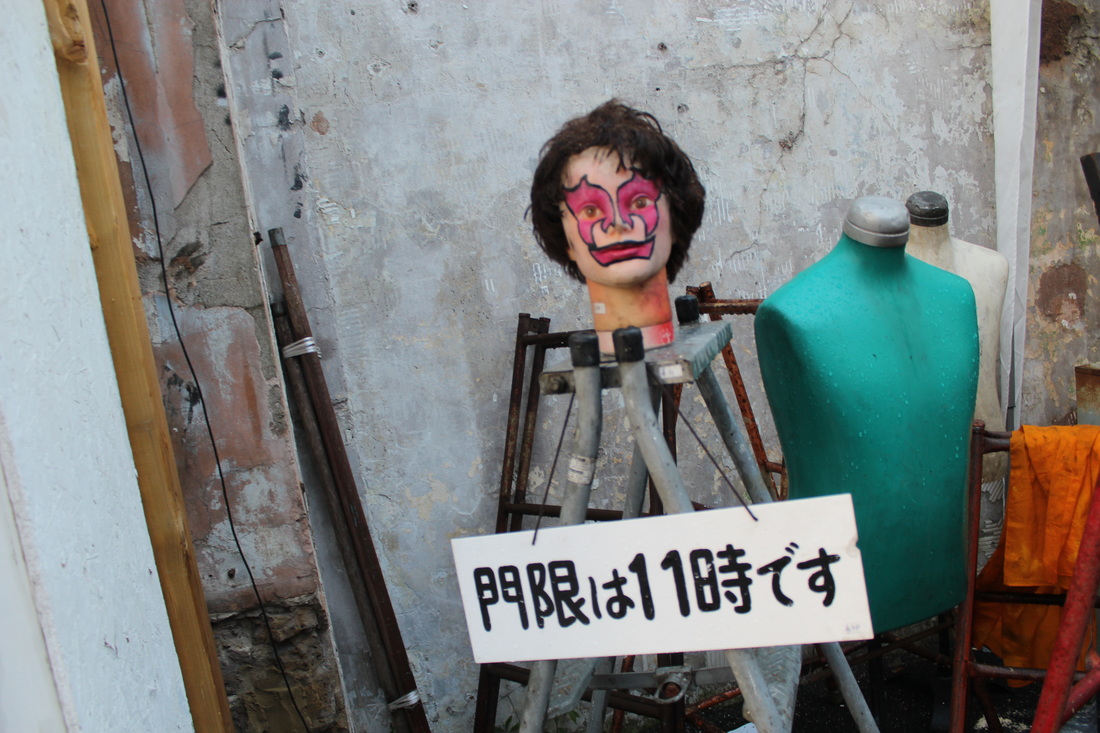
I took this shot of a hairdressing mannequin at the Peckham salvage yard using a Canon E05 DSLR. I made a colour print of the shot to use for my abstraction edits.
Development: Print Edits
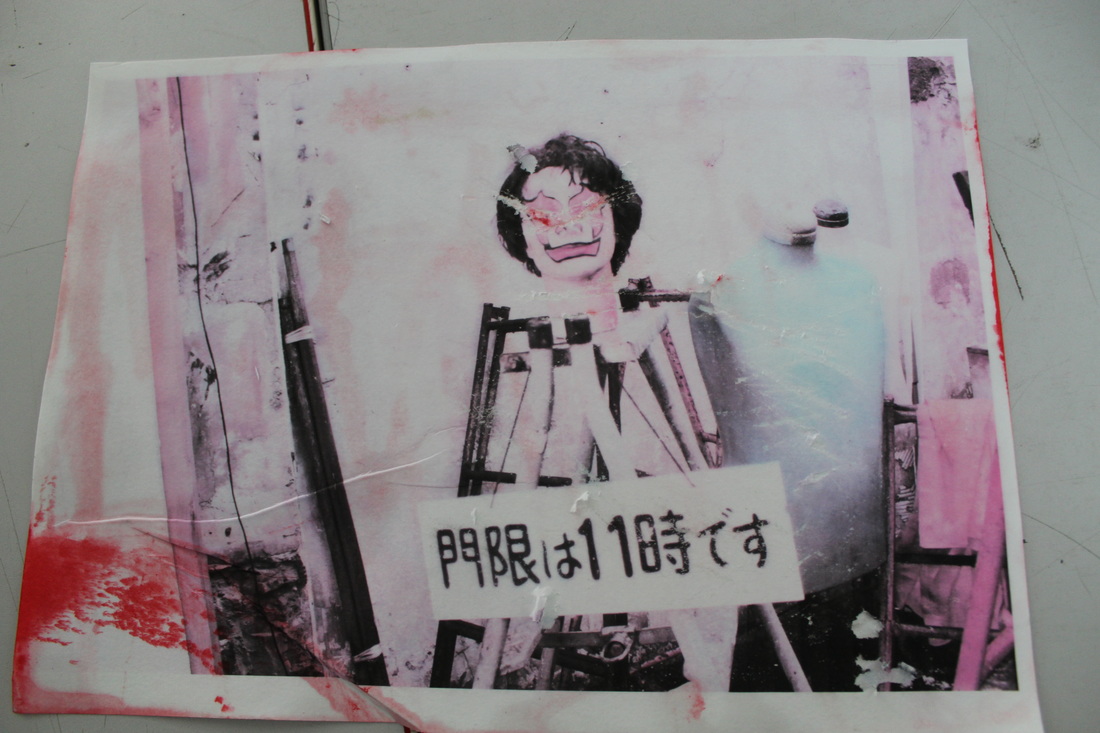
I took my colour print and bathed it in bleach for around 15 minutes. This lead to the fading of the image and damaged nature of the print. The bleach allowed the colours to stain and change in shade. To further this damaged aesthetic I used masking tape to pepper the print with small rips. Additionally I used keys to add scratches to the print, especially around the mannequins eyes. When drying the print I put it in the dryer at an angle to create fold in the paper. This fold when straightened out led to the scar like mark, on the prints left side. As a final touch I used a brush to flick watery red paint onto the reverse side of the print. This lead the staining around the prints edges.
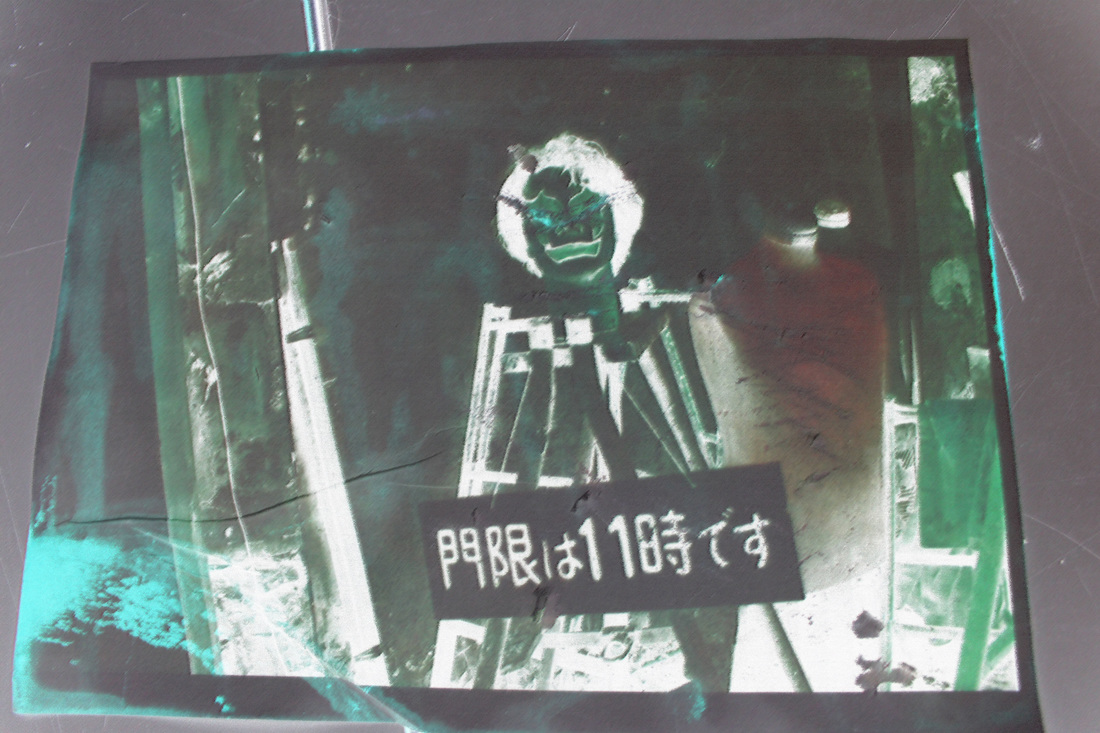
For this edit I inverted the colours and added a low intensity rough pastel texture. I used this combination to change the immediate appearance of the image without changing it's shape.
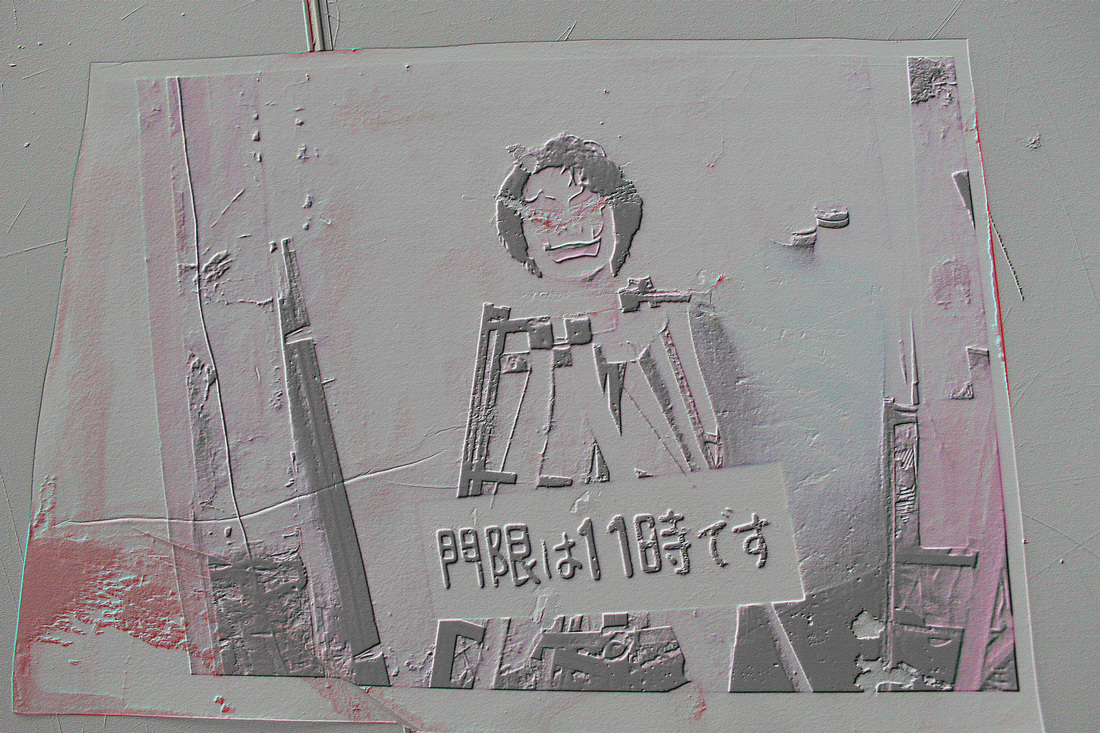
For this edit I mildly increased the saturation and then used the emboss texture effect. I made the effect high intensity while lowering the effects opacity. This allowed me to keep the drastic texture change while also retaining a modicum of the image's tone.
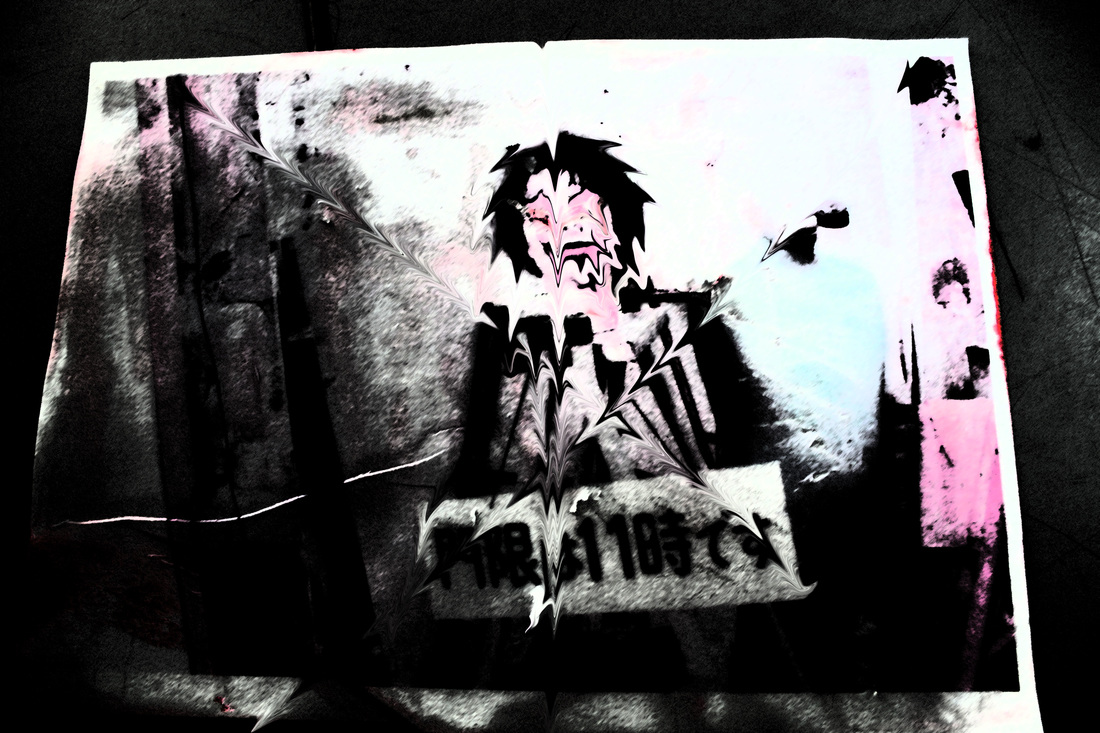
For this edit I lowered the contrast and then added the dark strokes texture effect at a high intensity. I mildly adjusted the saturation and then used the liquefy tool. I used the tool sparingly, creating 2 diagonal slashes and one straight vertical slash to distort the centre of the image. I liquefied the edges of the mannequin slightly to create the melting effect.

For this edit I focused on shape and colour rather than texture. I edited the saturation and hue, leading to the neon colour palette. I then used distortion tools to create the exploding oval effect. I adjusted the spherize tool to focus on the images centre (the stool) so as to create the circular shape framed by the rectangular shape of the print.
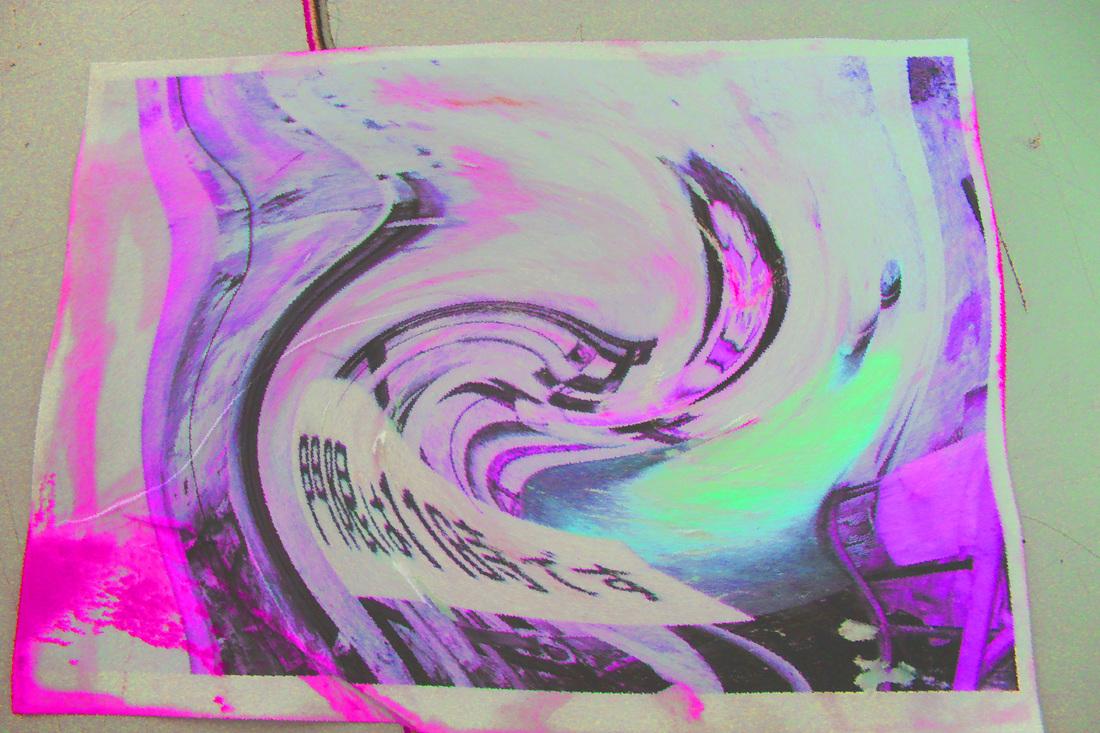
For this edit I combined large amounts of texture, colour and shape manipulation. I used distortion tools to bend the image from bottom-left of centre. After experimenting with different levels of distortion I adjusted the colour palette to focus on cool blues, greens and purples. I also lowered the brightness and saturation. Finally I added multiple layers of texture manipulation: primarily the cross hatching, texturise and rough pastel options.
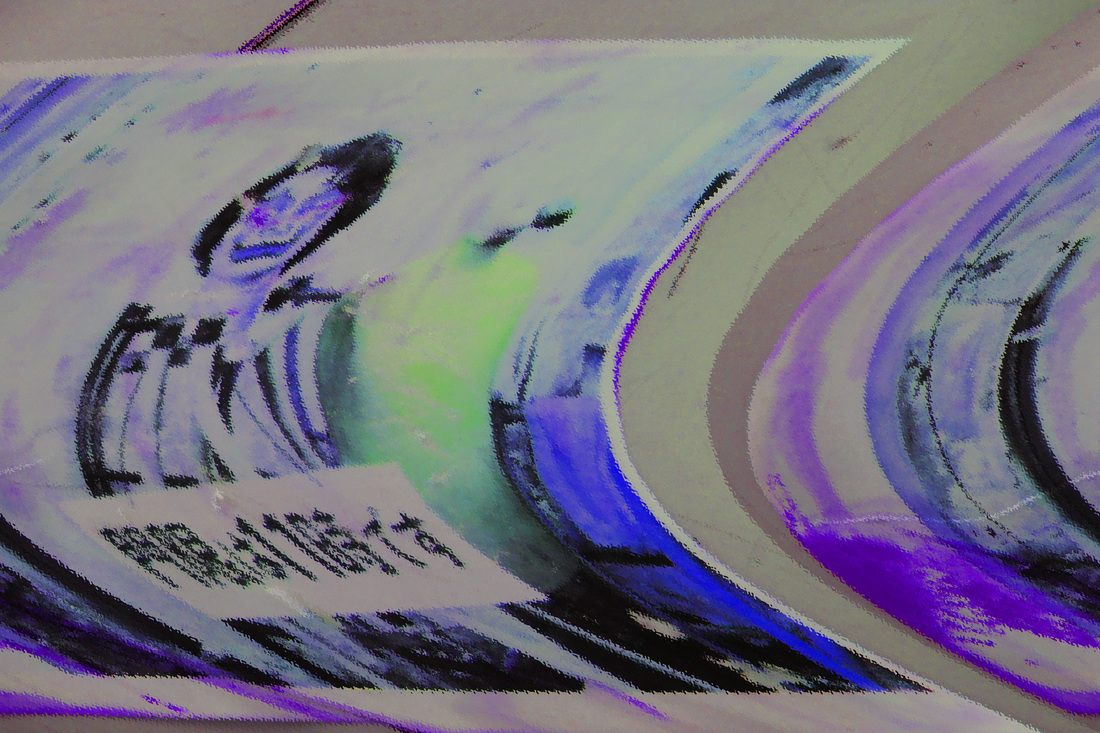
For this edit I used the swirl distortion tool to warp the photo from its central point. I then tweaked the hue, saturation and contrast to create the neon colour palette. Finally I added a low intensity glass texture.
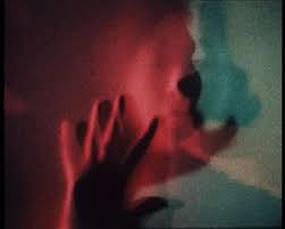
Erwin Blumenfeld
|
|
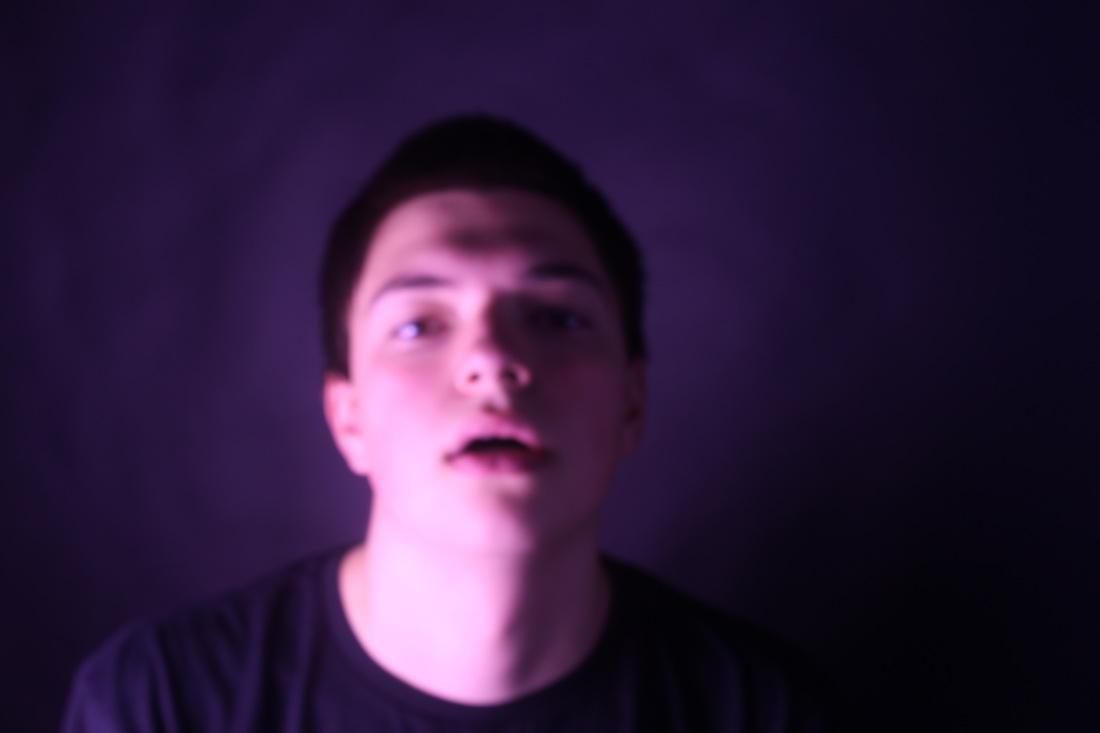
Erwin Blumenfeld is one of the most highly regarded photographer's of the 20th century. He has experimented with various techniques such as solarisation, blur, multiple exposures photomontage. He is widely known for his iconic fashion photography and experimental nature.
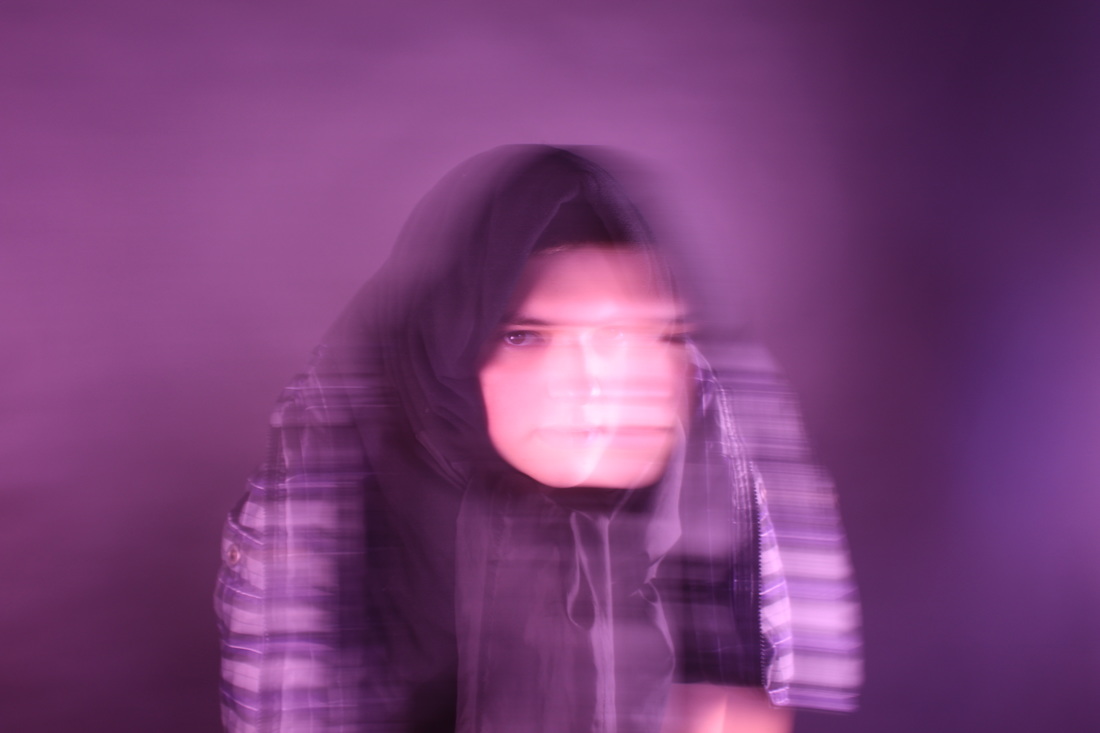
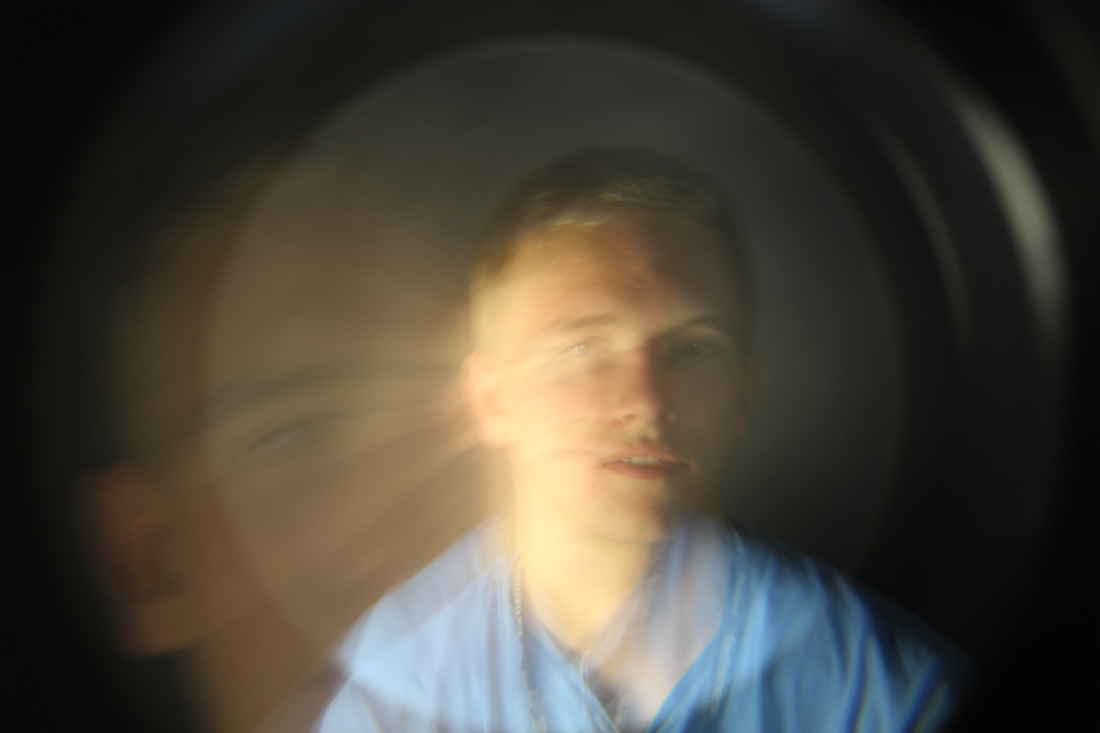
My Response
In my responses I tried to explore the distortion focus that Blumenfeld employed. Blumenfeld used entirely practical means to create his effects, creating images that are almost always somewhat recognisable despite their augmentation, to replicate this I relied on practical means too apart from using photoshop to adjust a colour palette and fine tune blur texture. In the first shot I employed a pink filter, giving the image a warm tone that combines with the blur to accentuate the image in a distorted manner while clearly retaining its identity as a portrait. In my second shot I utilised a telephoto lens, creating a fish eye lens, which when added to the low shutter speed blur, creates a twisted feeling of both depth and motion. This was an intended twist on the way in which Blumenfeld used segmented glass to break up an image: giving it too a strange sense of depth and motion. In my final image
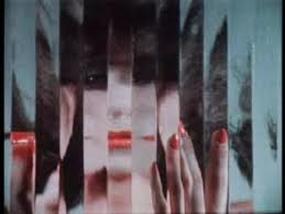
Bill Jacobson
|
|
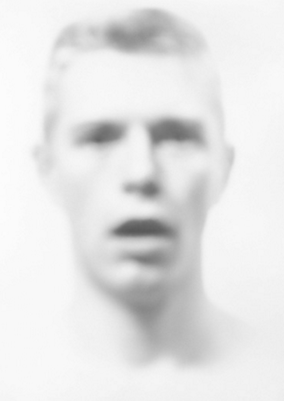
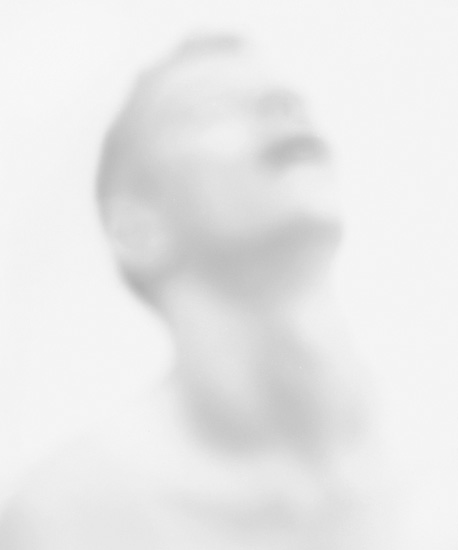
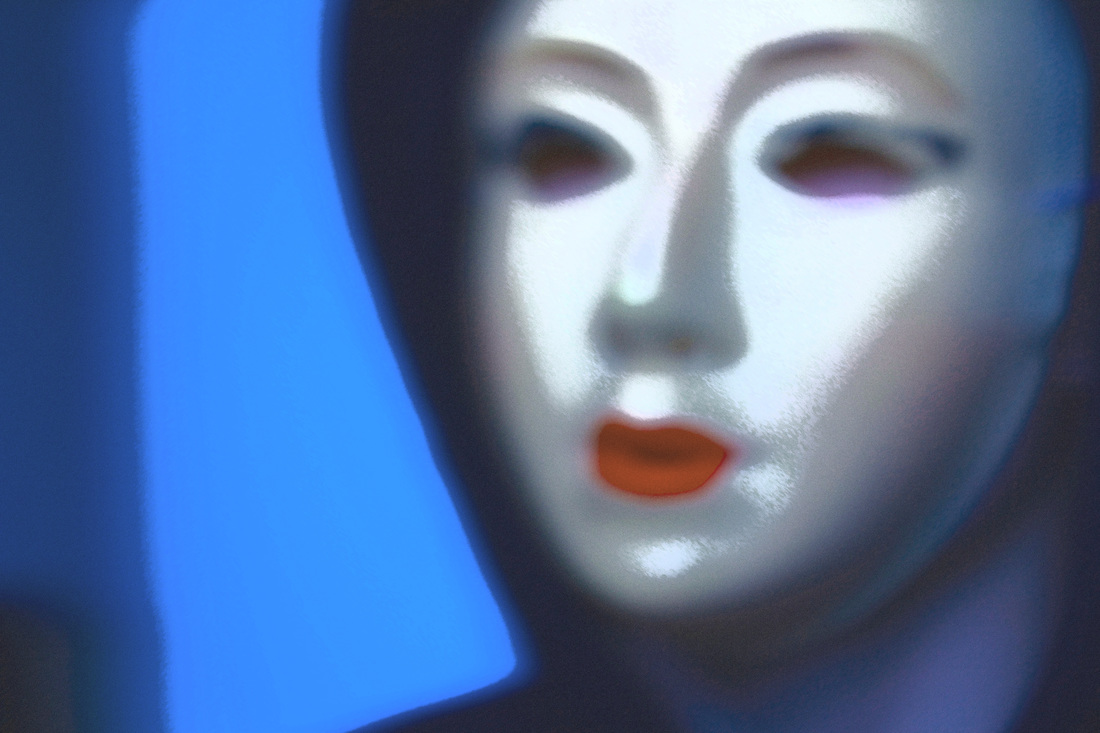
Bill Jacobson shot a series of monochromatic, blurred portraits. Each photo depicts a mans head shot out of focus. The style of the portraits aim to represent mortality and loss, inspired by Jacobson's experience of AIDs epidemic in the 90s.
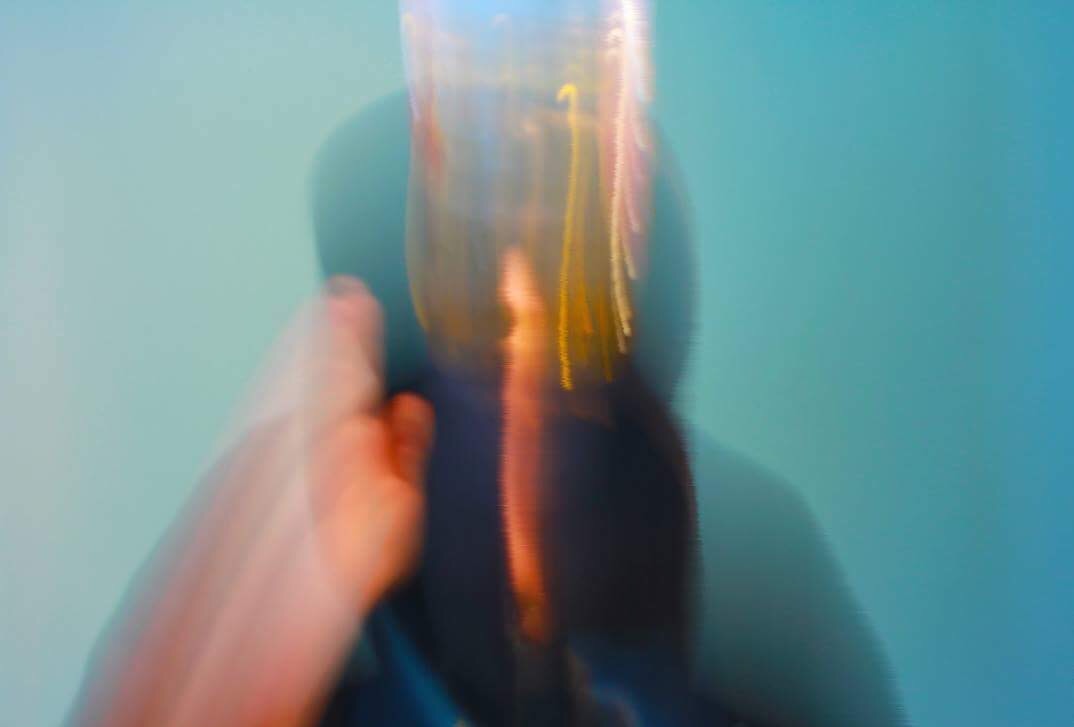
My Response
Whereas Jacobson centred his shots around a lack of colour, I placed strong emphasis on colour and tone in my response. I did this to give each shot a unique atmosphere and surreal quality. I used photoshop on my first shot to give the mask a silvery sheen (using film grain effect) and bring out the contrast between the mix of blues in the background and bright red of the lipstick. For the second shot I framed it as a more traditional portrait but used a pink filter on my camera to give the whole shot a dreamlike rose tint.
Saul Leiter
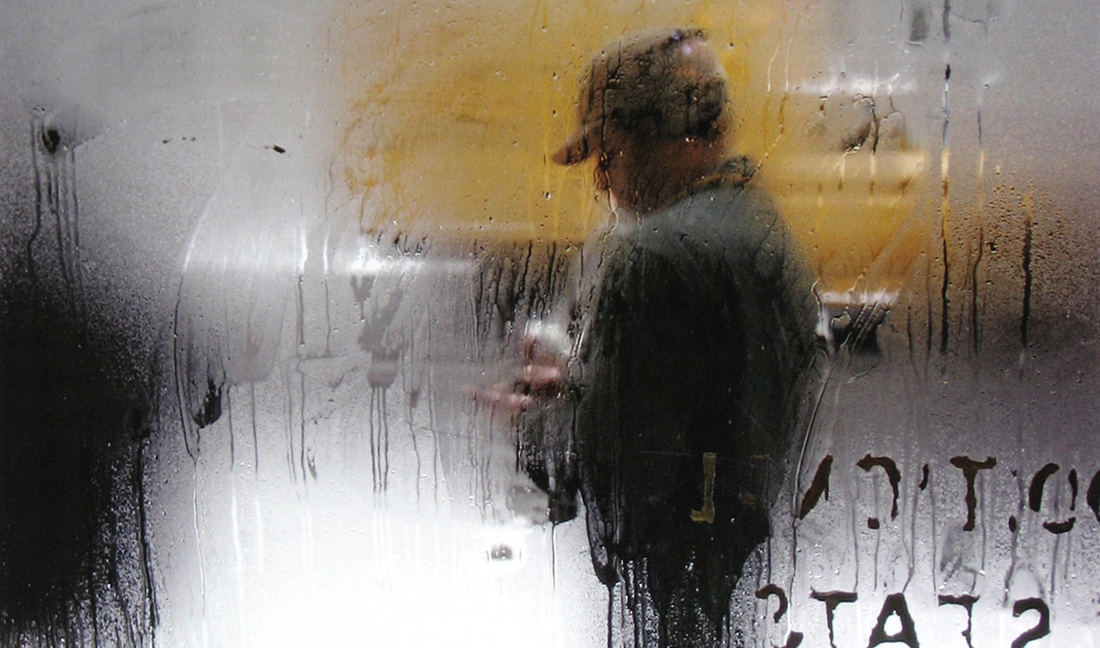
Saul Leiter was a photographer that aimed to capture urban life with an abstract focus on obstructions, blurring and concealment. Leiter's shots all have a dream like quality to them and he emphasised the surreal aspects of urban scenes. He was included in Jane Livingston's "New York School", a collection of notable mid century photographers, such as Diane Arbus.
My Response
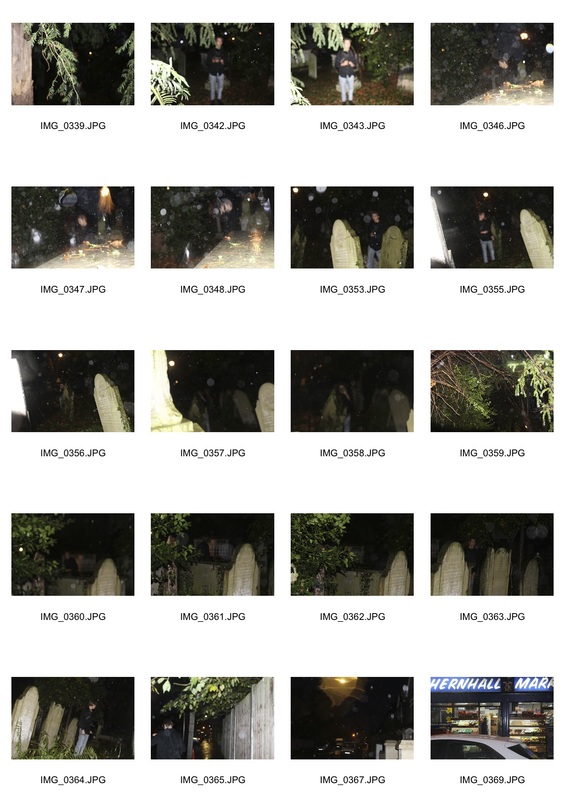
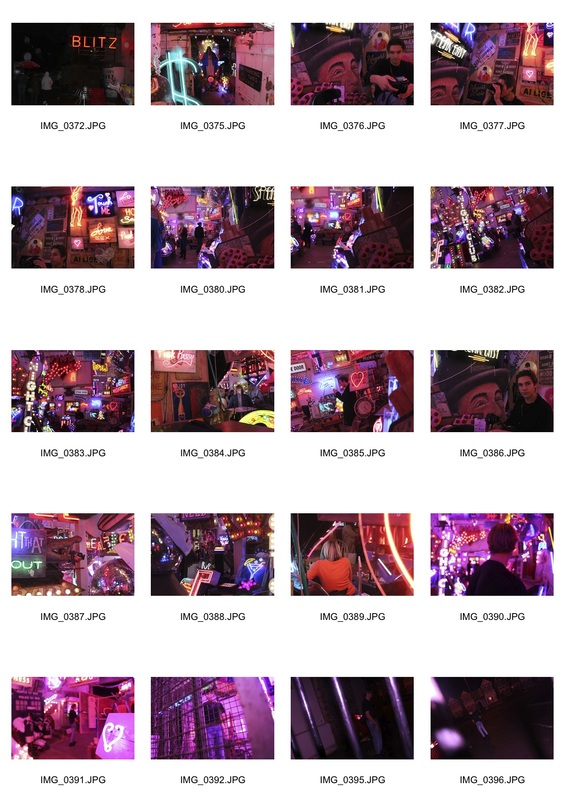
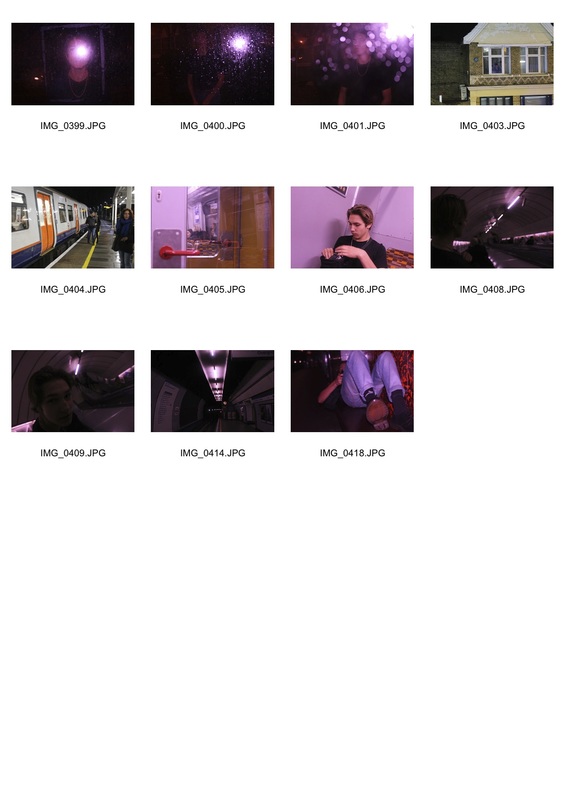
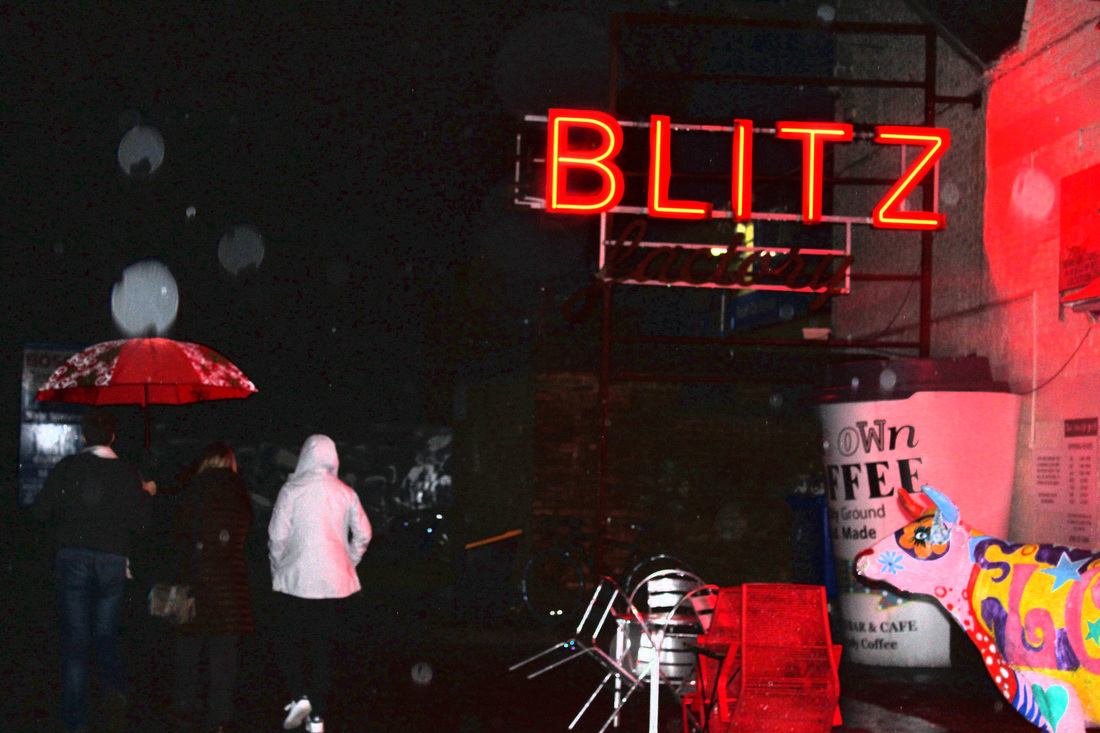
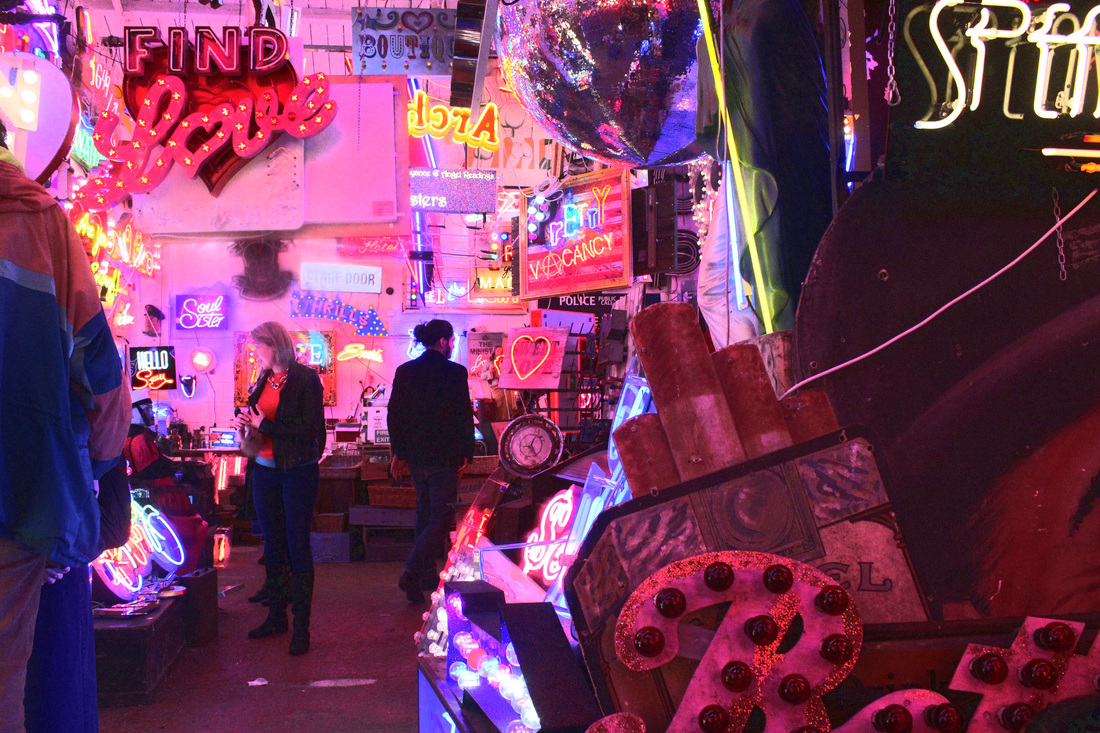
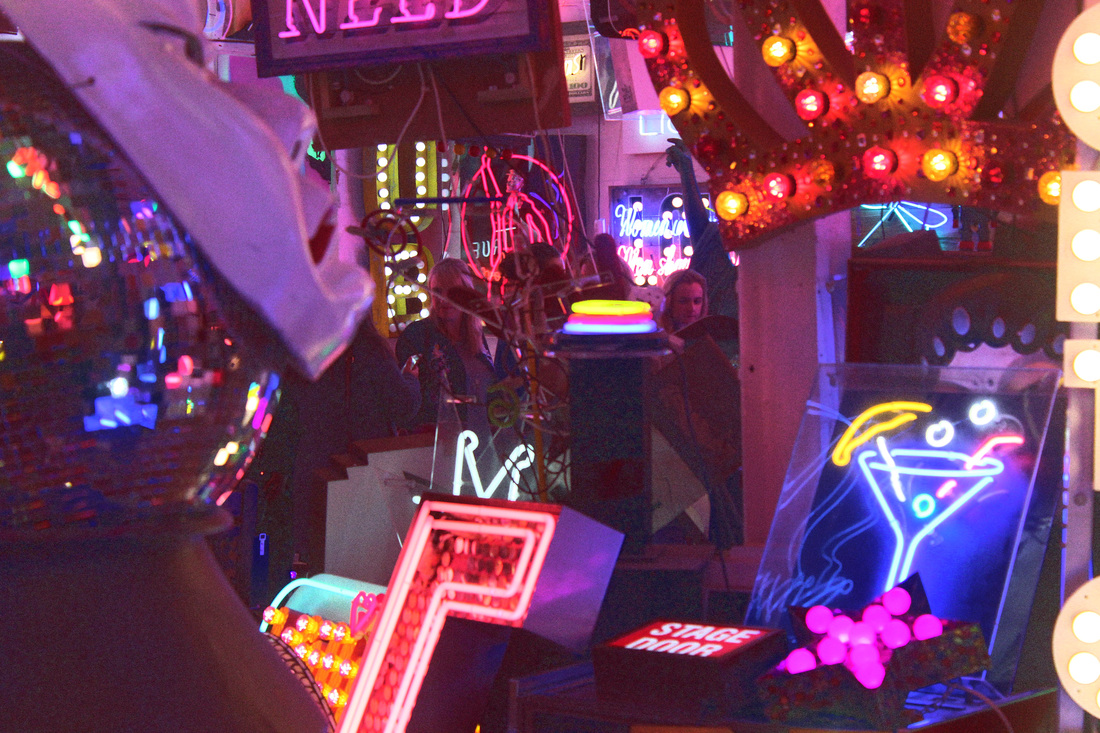
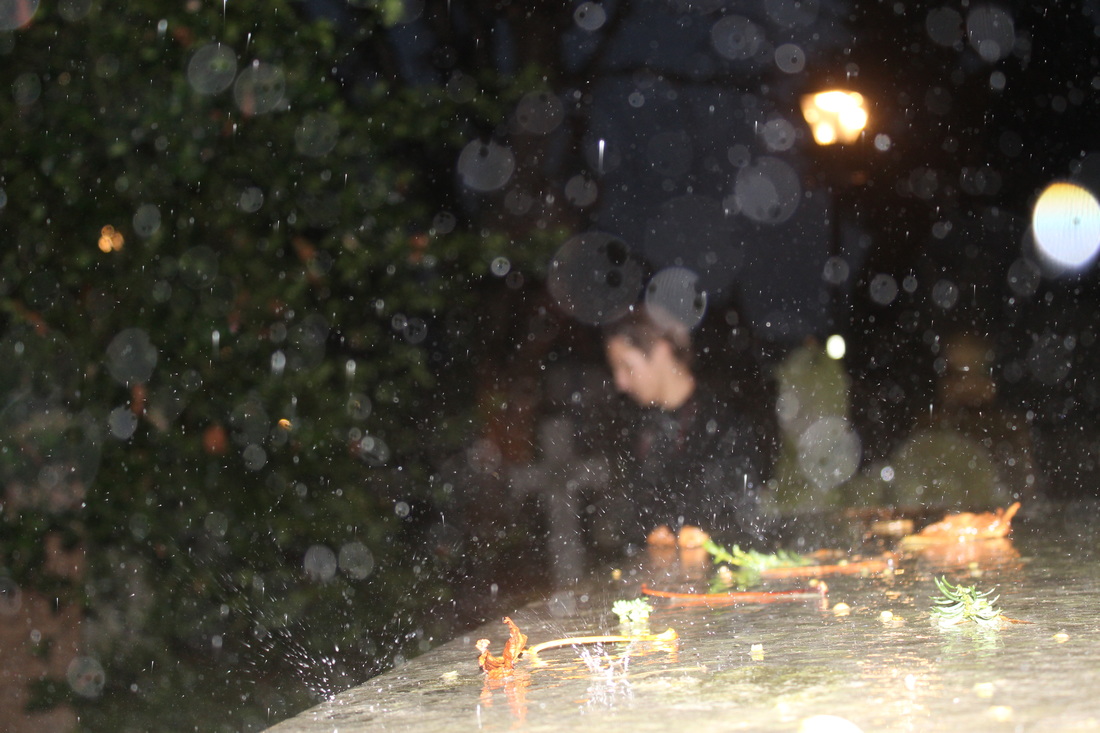
The primary locations I visited for my response were God's Own Junkyard and a nearby graveyard, both located in Walthamstow. I focused my response around obstructions, hidden details and blurring. To try and replicate Leiter's style more faithfully I added a film grain effect to some of my shots in photoshop. I further mimicked his dreamlike style by shooting in the rain at the graveyard: the wet lens allowing for light to be captured in a more surreal way with the use of my flash. At God's Own Junkyard I used the plentiful neon light to accentuate my shots, as well as the overall cluttered aesthetic to give my shots a feeling of depth and detail, especially when partially blurred.
Three Strands
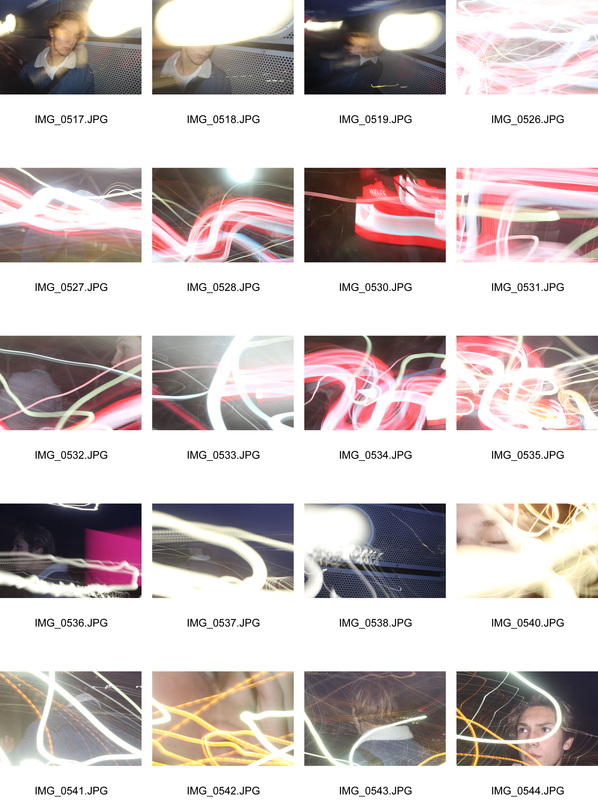
First Strand: Painting With Light And Shutter Speed
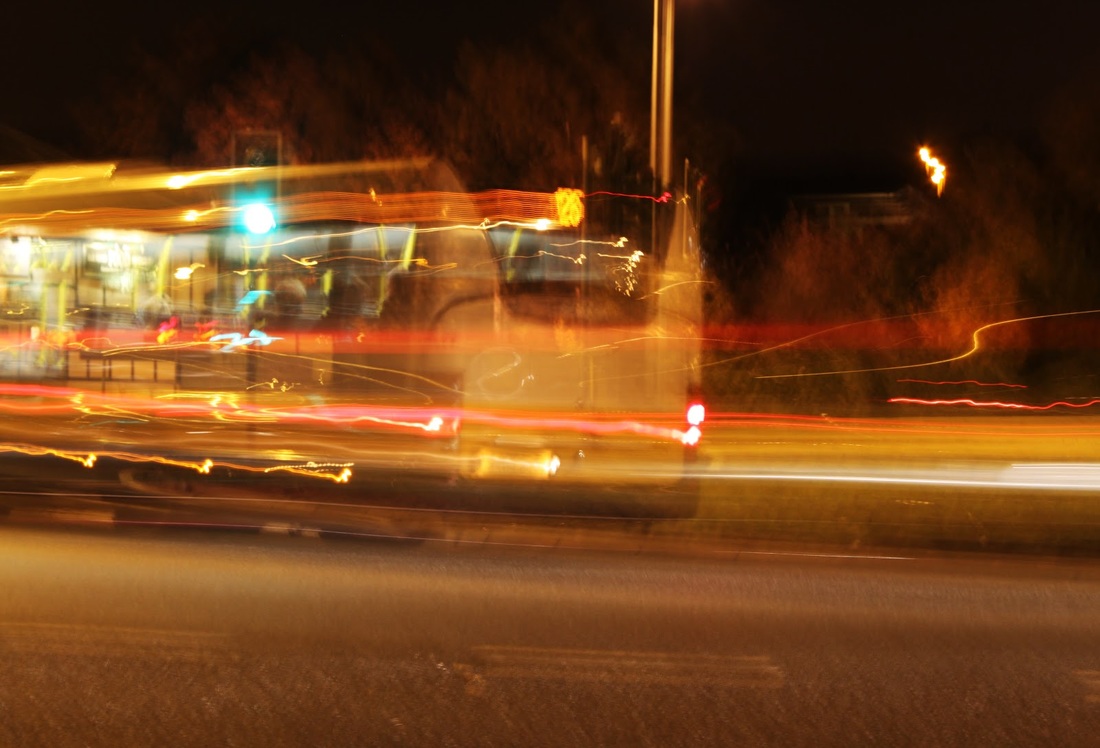
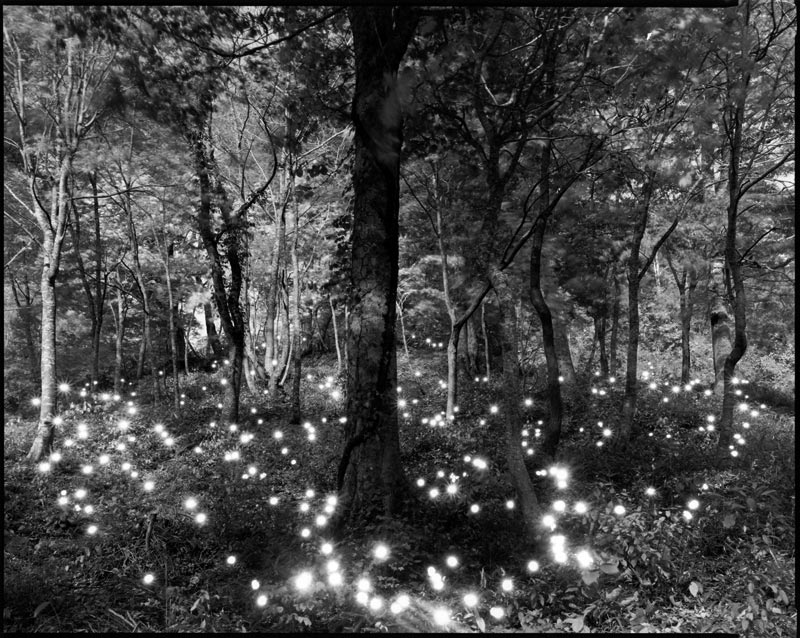
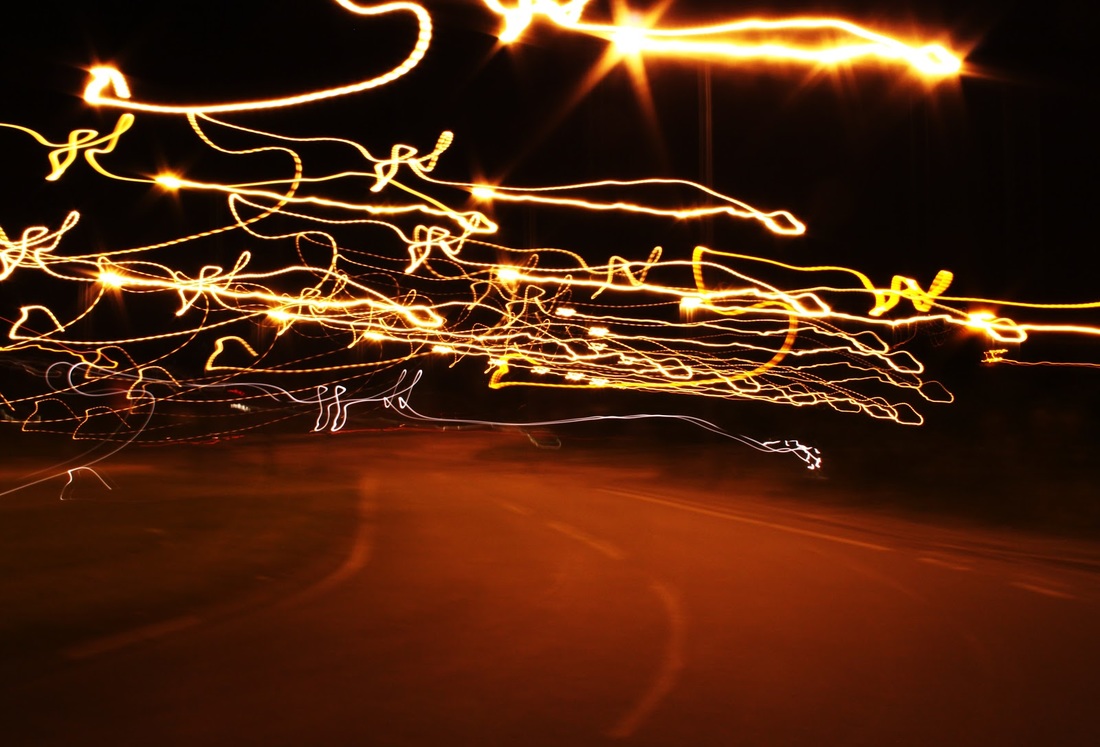
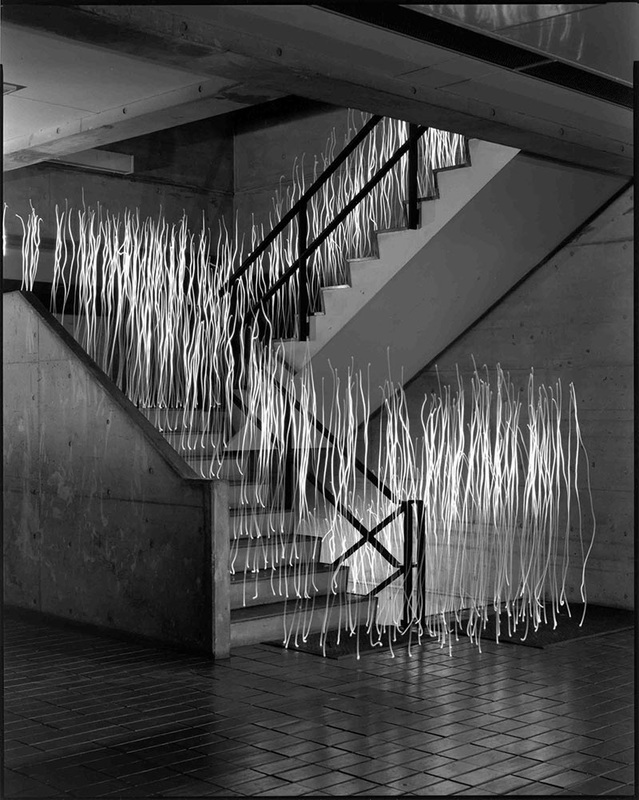
For my first strand I took inspiration from Photographers such as Rut Blees Luxembourg and Tokihiro Sugimoto (see above) and their use of shutter speed to 'paint with light'. Both photographers use long shutter speeds to manipulate light, creating trails and patterns through the movement of the camera.
Rut Blees Luxemburg
Luxemburg is known for her experimentation with shutter speeds, used to create flowing designs and a sense of motion, she uses street and break lights to create a mix of tones that contrast well with the overall darkness of each shot.
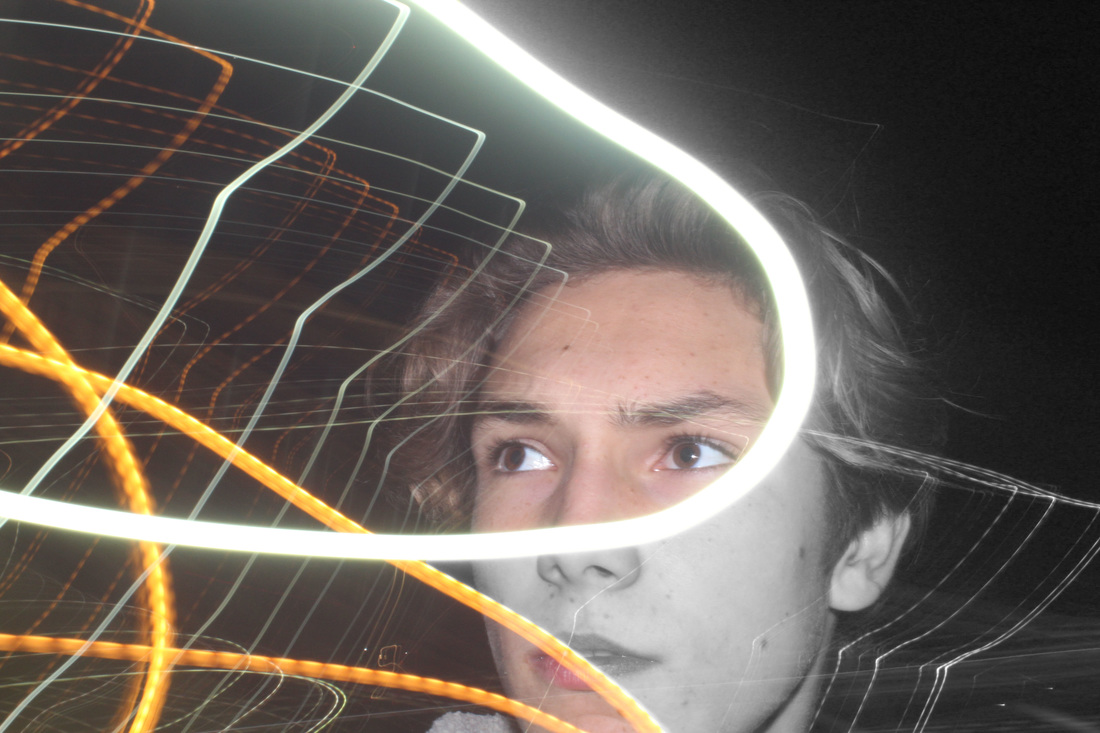
Tokihiro SugimotoSugimoto focuses on the 'persistence of light', using light painting techniques to create nets of light that both serve as a focus in their own right as well as accentuating the environment pictured in each shot. The nets often create a path or sense of presence, for example tracing the path of someone climbing stairs. In my response I aimed to replicate this duality, using portraits primarily rather than environmental shots, but still making sure the overlay of light did not entirely drown out the image beneath.
|
|
Response
Development
Second Strand: Experimentation
Influence: Scrapbook/Cut and Stick Art
I centred this strand around the concept of scrapbook art and DIY sensibilities being blended with Surrealism. I used simple shots , primarily portraits and then used photoshop to take them to different levels of surreality. I was careful to maintain the scrapbook aesthetic so that all the stylistic choices I made looked as if they could just as easily been done with scissors and glue (even when in fact many would of been impossible).
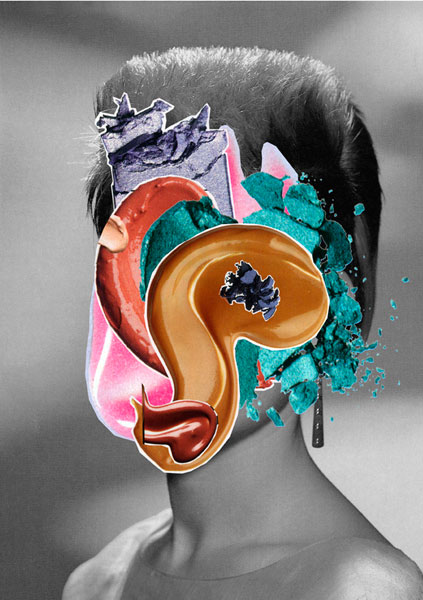
The cut and paste scrapbook pieces by Ludovica Gioscia were my biggest inspiration for this strand. The way in which she uses abstract elements to enhance basic shots, often via covering selected parts of the image.
Response
|
|
Development 1
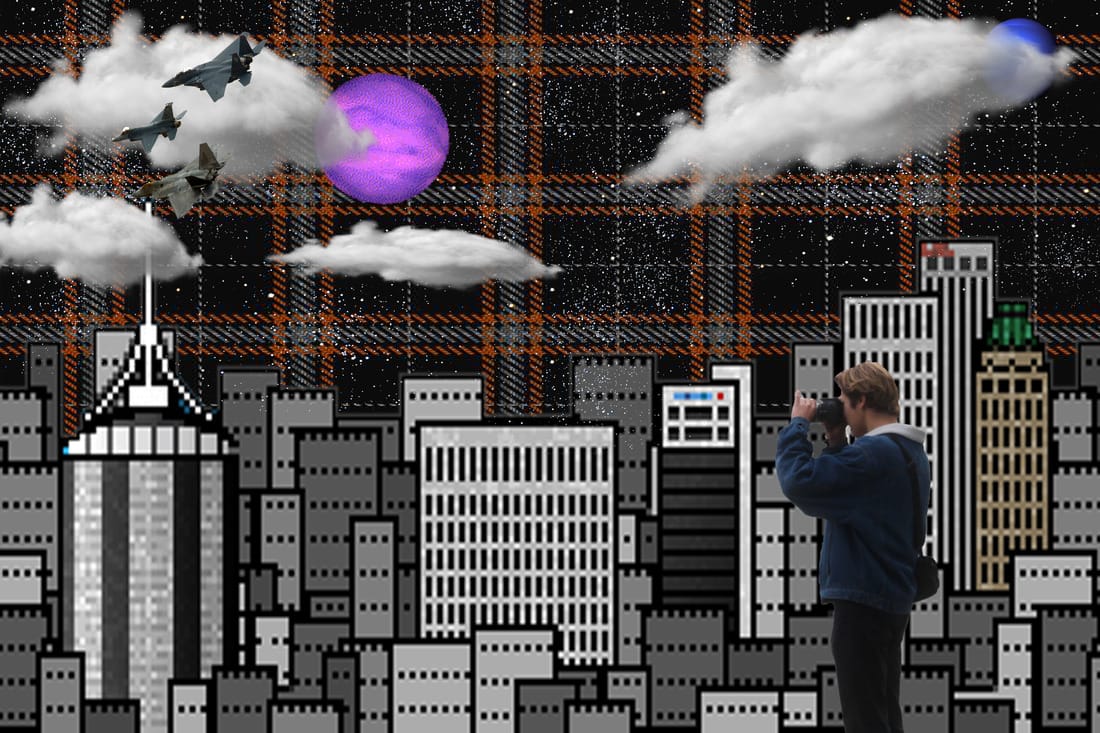
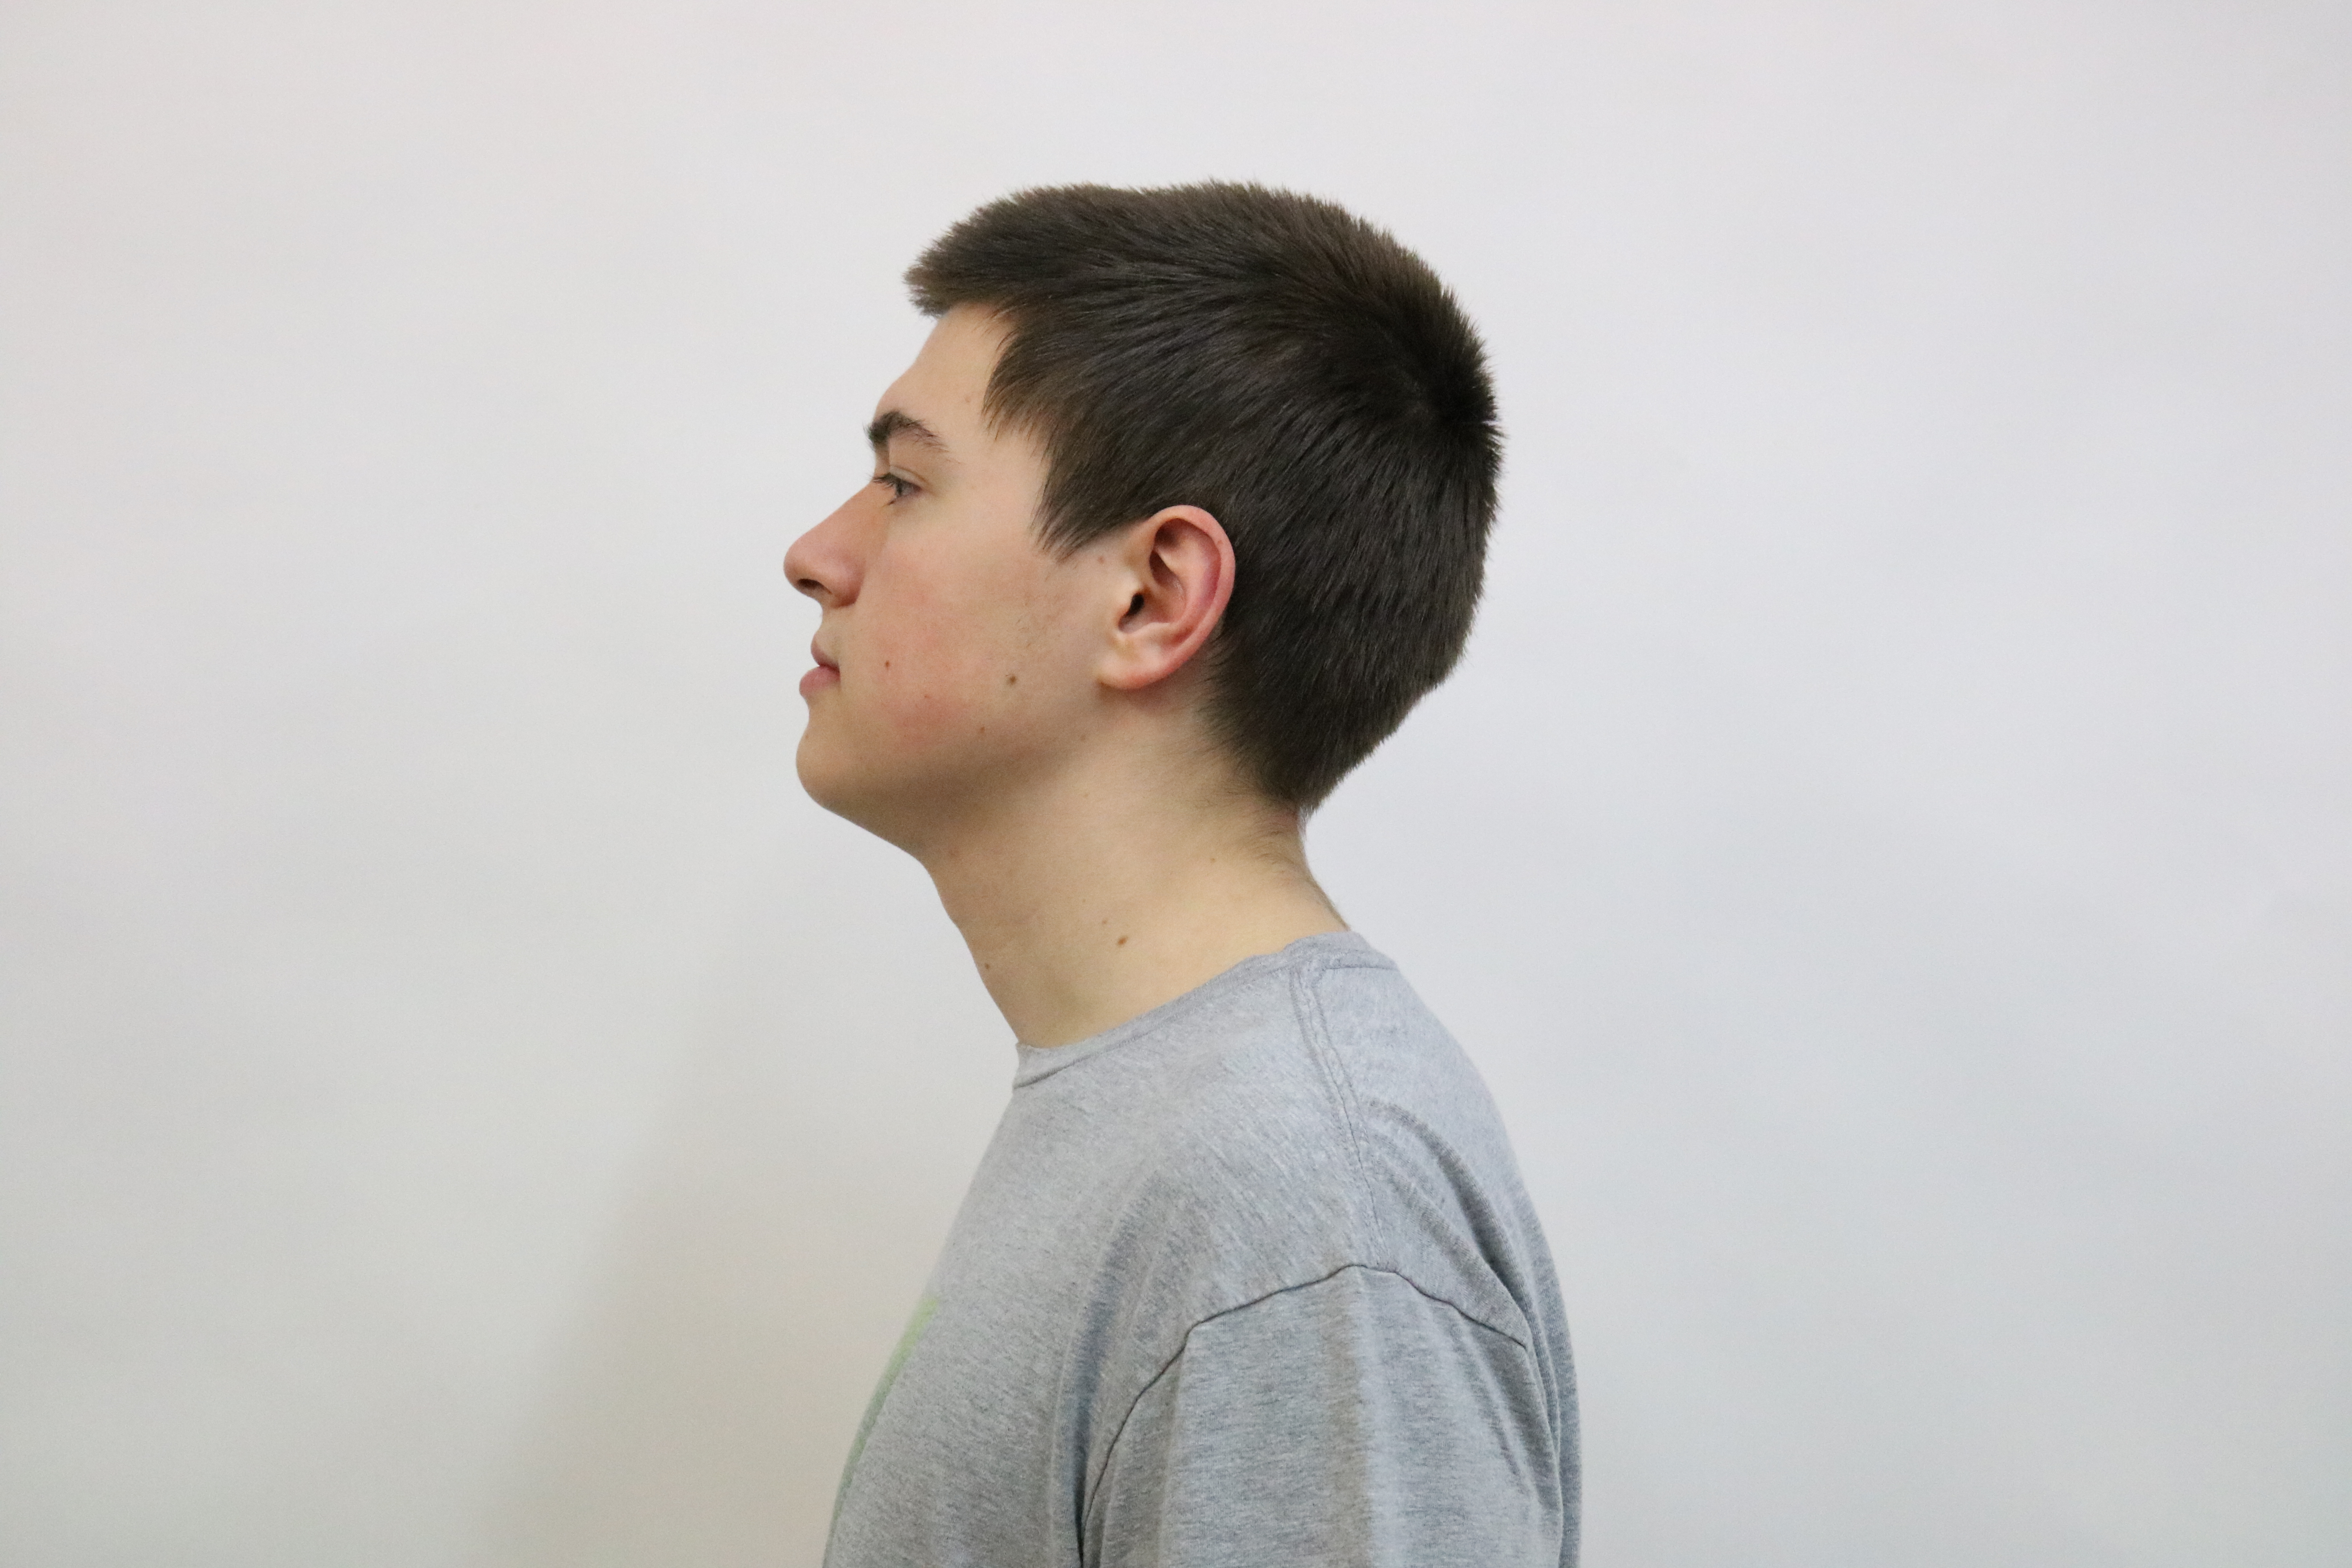
In this image I took the abstract focus to an extreme. Wheras in earlier images I took a mundane sihoulette and plain background, changing an aspect of said sihoulette to create the surreal scrapbook effect, in this image I kept the sihoulette unaltered, instead taking the background to the point of being a dreamlike mural of conflicting images. I collected a series of images: firstly a stock image of a swatch of black tartan fabric, which I used as the base for the entire image. This base served as an initial layer of abstract imagery while grounding the whole composition, serving as a recognisable night sky when I added the star overlay. I then added a few copies of a stock cloud, warping each one slightly (via smart object manipulation) to create a unique appearance for each. The contrast between the clouds and the tartan sky further accentuates the strangeness of the image, and its cobbled together, scrapbook aesthetic. I then took two different images of Neptune, one a 16 bit rendering from a Galaga knock off ,that I found online and the other an image captured by telescope. I shaped these images as smart objects and placed them at a middle layer, under the clouds and above the stars, giving the mural a much needed feeling of depth. The contrast between the two textures and fidelities also applied further weirdness to the overall image.
Development 2
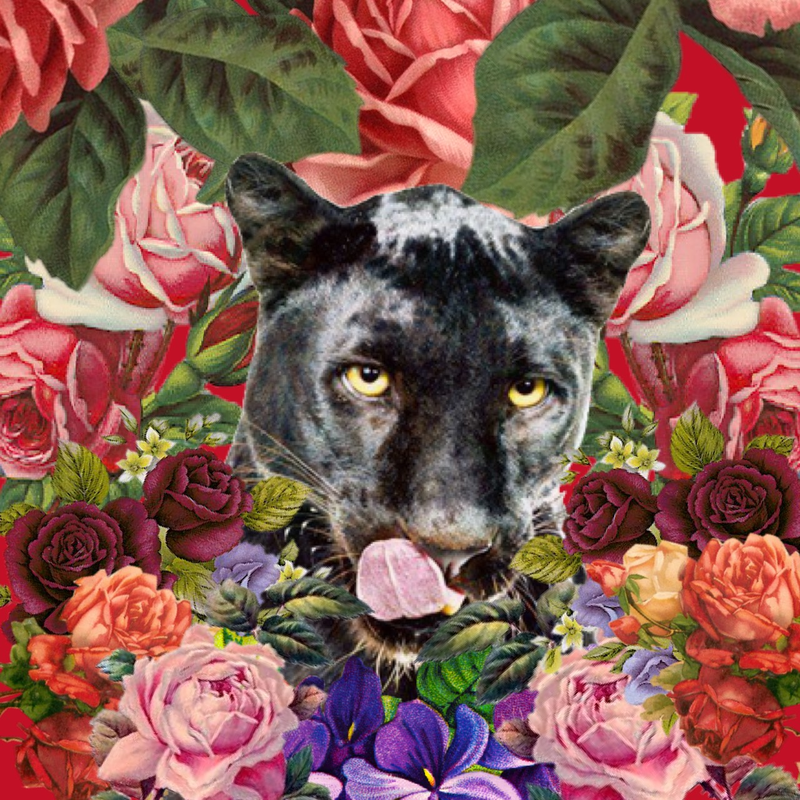
I took the core aspects of my prior response in a new direction for this image, combining it with elements from one of my other major influences (see below). Instead of using one of my own photos to centre the piece, this time I used resources that were freely shared by Vaporwave artists on the various forums dedicated to the art form. Like in the prior piece I emphasised the interplay between different levels of image fidelity, within the composition. I mixed drawn and painted flowers with a photorealistic Panther and flat red background, creating three distinct levels of fidelity running through the image. Finally I melded two of the key aesthetic traits of Vaporwave and Scrapbook, density and symmetry. While a lot of Vaporwave makes a large effort to be perfectly symmetrical, aesthetic dioramas Scrapbook conversely likes to layer its images with lots of material, to give the picture a feeling of clutter. I used matching flowers on each side and altered their sizes, angles and layer order to warp any strict symmetry and to create the dense, cluttered look.
Influence: Vaporwave and Glitch Art
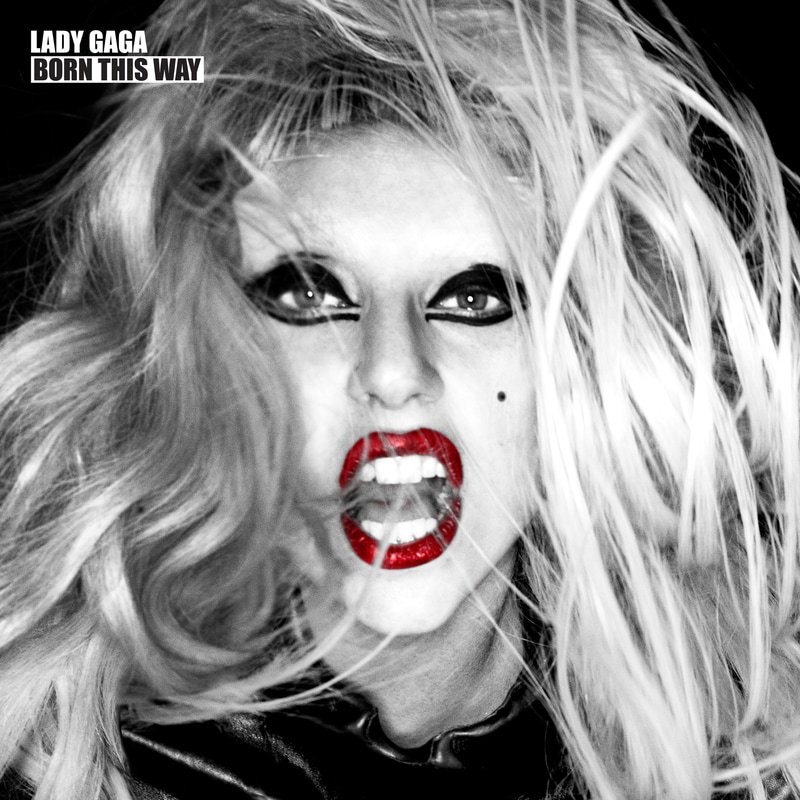
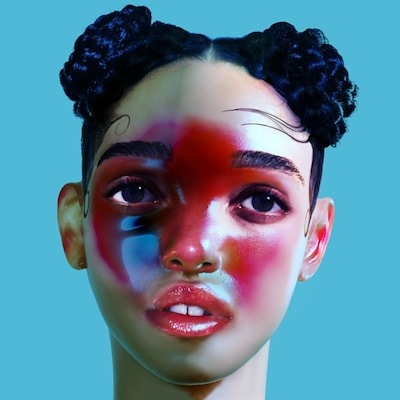
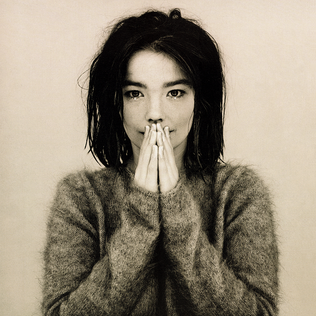
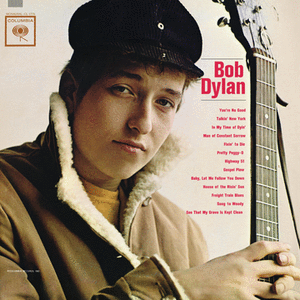
Traditional portrait album covers
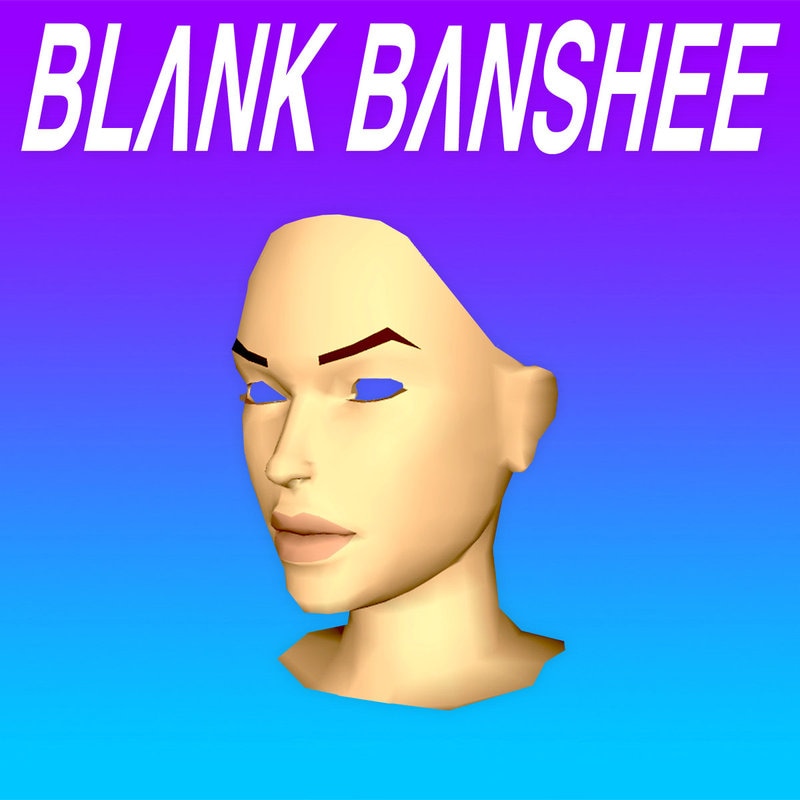
The album cover for Blank Banshee's 2013 release 'Blank Banshee 0' was a large influence on all vaporwave art and my work in this strand. The abstraction and subversion of the stereotypical portrait album cover, is a clear expression of the themes of this art style. Vaporwave concerns itself with internet and retro culture, while also touching on the relationships between humans and technology, as well as emotional issues and social isolation. In the case of the iconic Blank Banshee cover the use of a disembodied, lowpoly face (character model from tomb raider PS2) symbolises these themes. Setting melancholic or unnerving images to colourful (often neon) backgrounds to juxtapose with the often depressing messages of piece is another core tenant of vaporwave style art.
Development 3
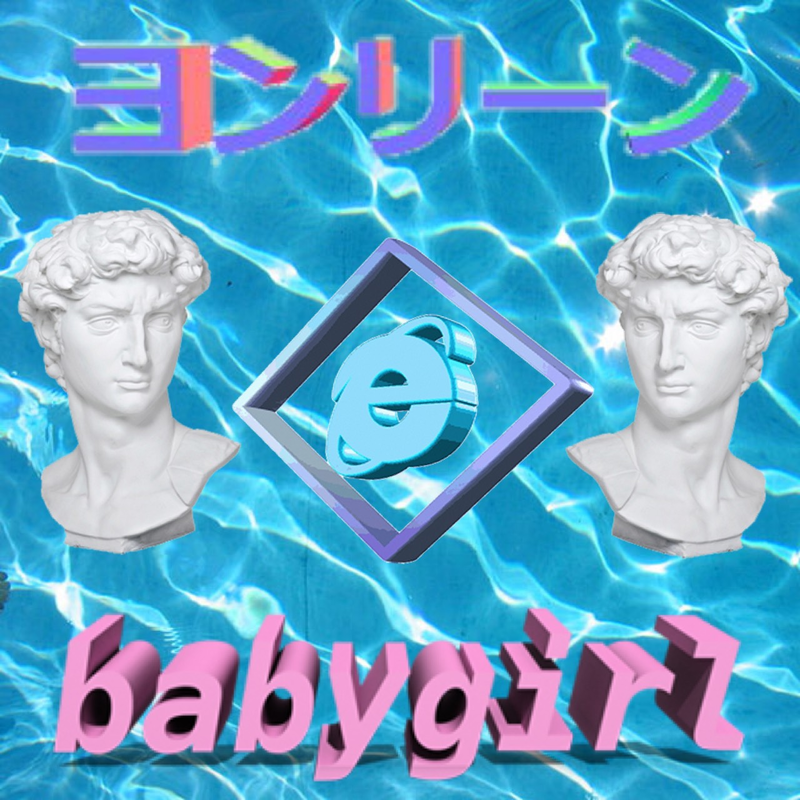
I made this basic vaporware piece to illustrate some of the basic elements of the style and how they can be composed. Traditional Vaporwave art arranges the iconography on a vibrant, 'aesthetic' background (water is a very popular choice). The composition places emphasis on symmetry and the arrangement of seemingly unrelated objects (busts and a retro windows logo) to create a cohesive feeling or mood, that is implicitly understood within the sub cultural context.
Provocative text in bold fonts and purposely nonsensical foreign text (often Korean, Japanese Hirogana and Kanji and occasionally Cyrillic based languages, such as Russian) is also a core part of this feeling. Pop culture touchstones, frequently altered to embody some aspect of the subculture (various revisions of the Evian logo) can also be used. Retro imagery and relations to other internet subcultures (where there may be crossover) or pop culture is another core aspect.
Vaporwave art can also be viewed as an evolution of the scrapbook style of artists like Ludovica Gioscia: taking unrelated, colourful imagery and layering it all together to create a new, cohesive aesthetic feeling. This pursuit of a unique, patchwork aesthetic is the thing that I believe best characterises Vaporwave art and all of its offshoots.
Development 4
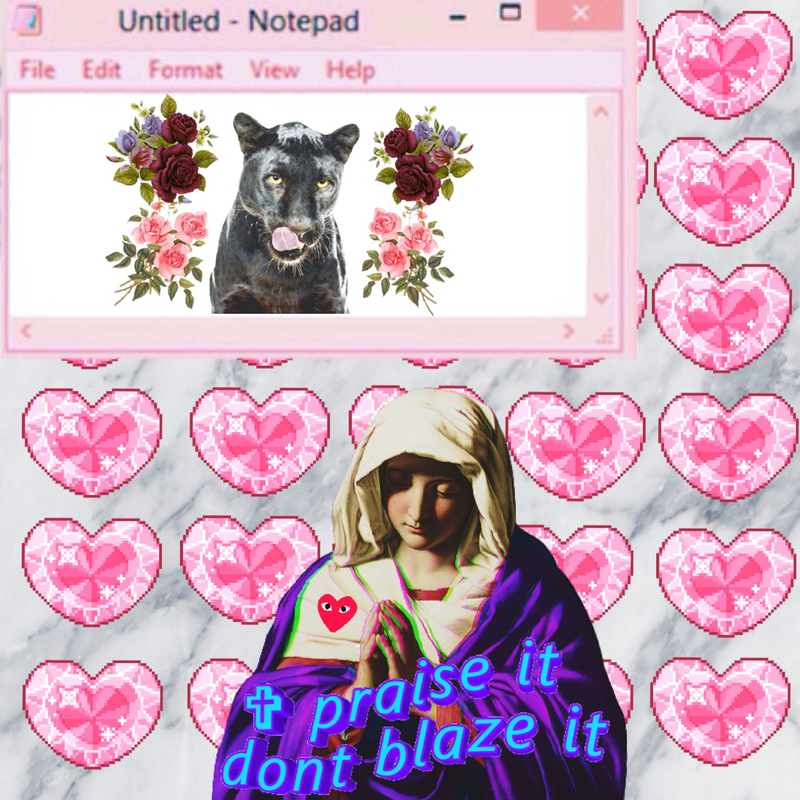
In this development I aimed to create a dichotomy between the traditional structure of vaporwave and breaking from it. I began by choosing a traditional marble texture background, a staple of vaporwave much like water or more digital backings. I then added a layer of of 16 bit hearts arranged symmetrically. Together these two elements formed a traditional vaporwave structure, which I used as a foundation to build off, for the rest of the image. Vaporwave images typically have a centralised focus, with all elements serving to accentuate the middle of the image. Initially I conformed to this rule by placing the image of The Virgin Mary centrally (after adding a slight colour shifted chromatic aberration). Another small touch was the addition of the CDG logo on Mary's right shoulder, both fitting with typical Vaporwave style ( fashion imagery and logos are VW staples but the CDG play heart is less commonly used) and matching the heart motif I had already established in the image. I added the text in next: while a lot of captions and phrases used in VW are melancholy, humour and satirical captions are also prevalent and that was the approach I took. The text itself plays on many of the 'meta' elements of VW, with drug culture and drug use often being a theme, but in my case taking a comically anti drug stance. VW leans heavily on the use of iconography (logos, phrases, memes, recycled images) for example the constant insertion of specific greek statues in many different artists works, for this image I decided to create my own signature image, reusing the Black Panther surrounded by flowers, that had been the focus of a prior response. Instead of inserting this image directly
Final Piece
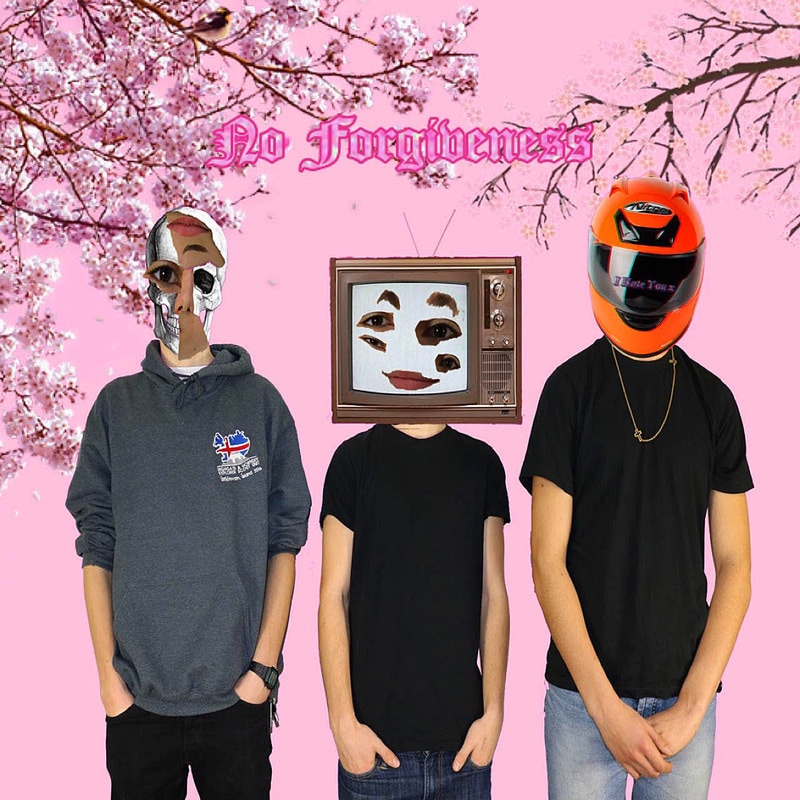
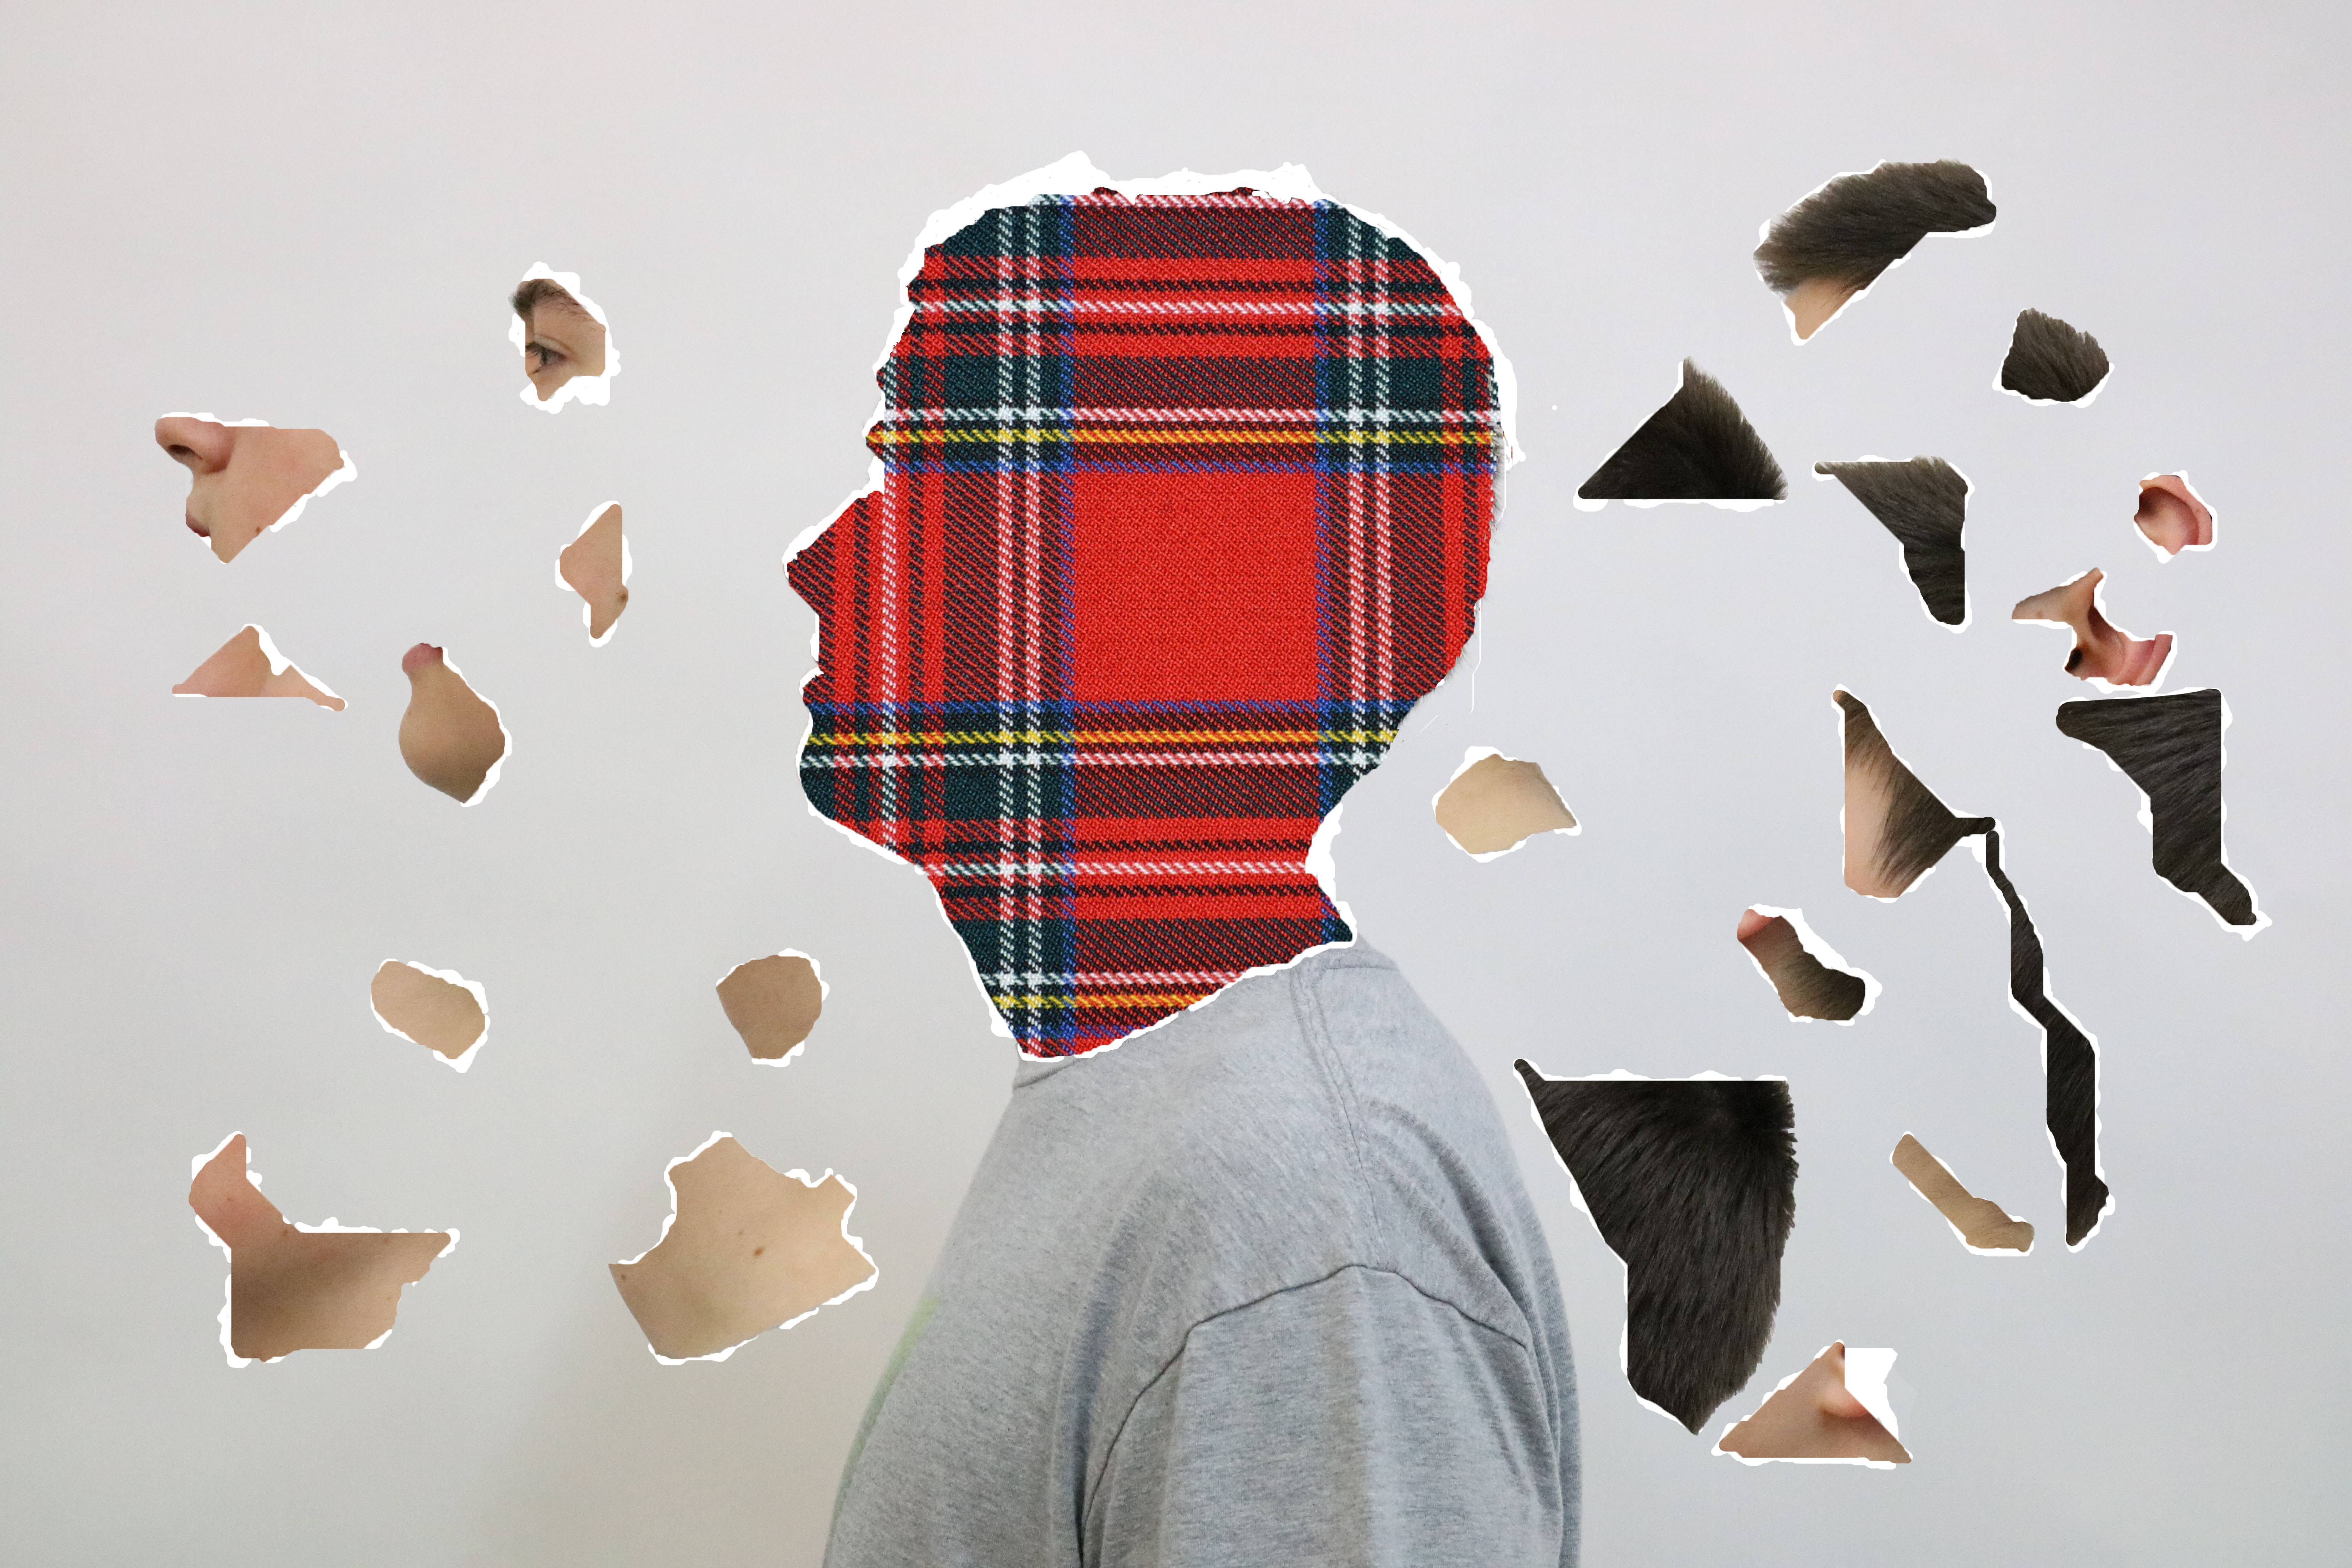
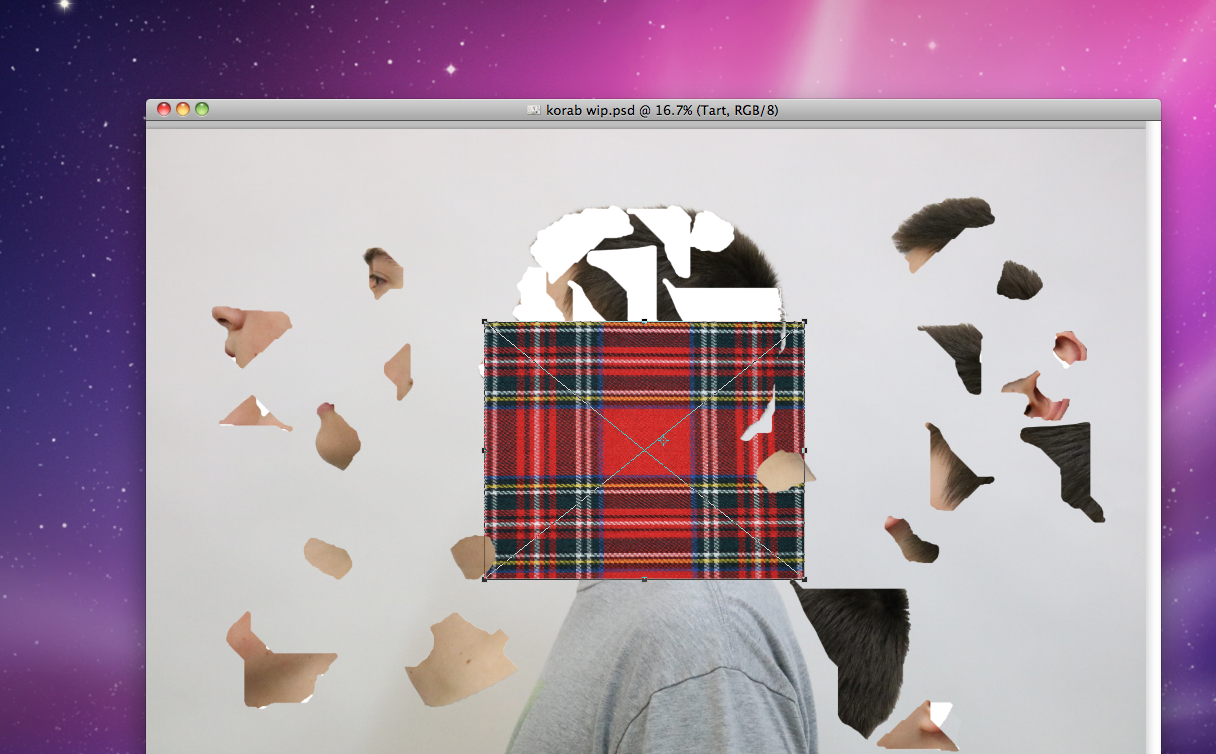
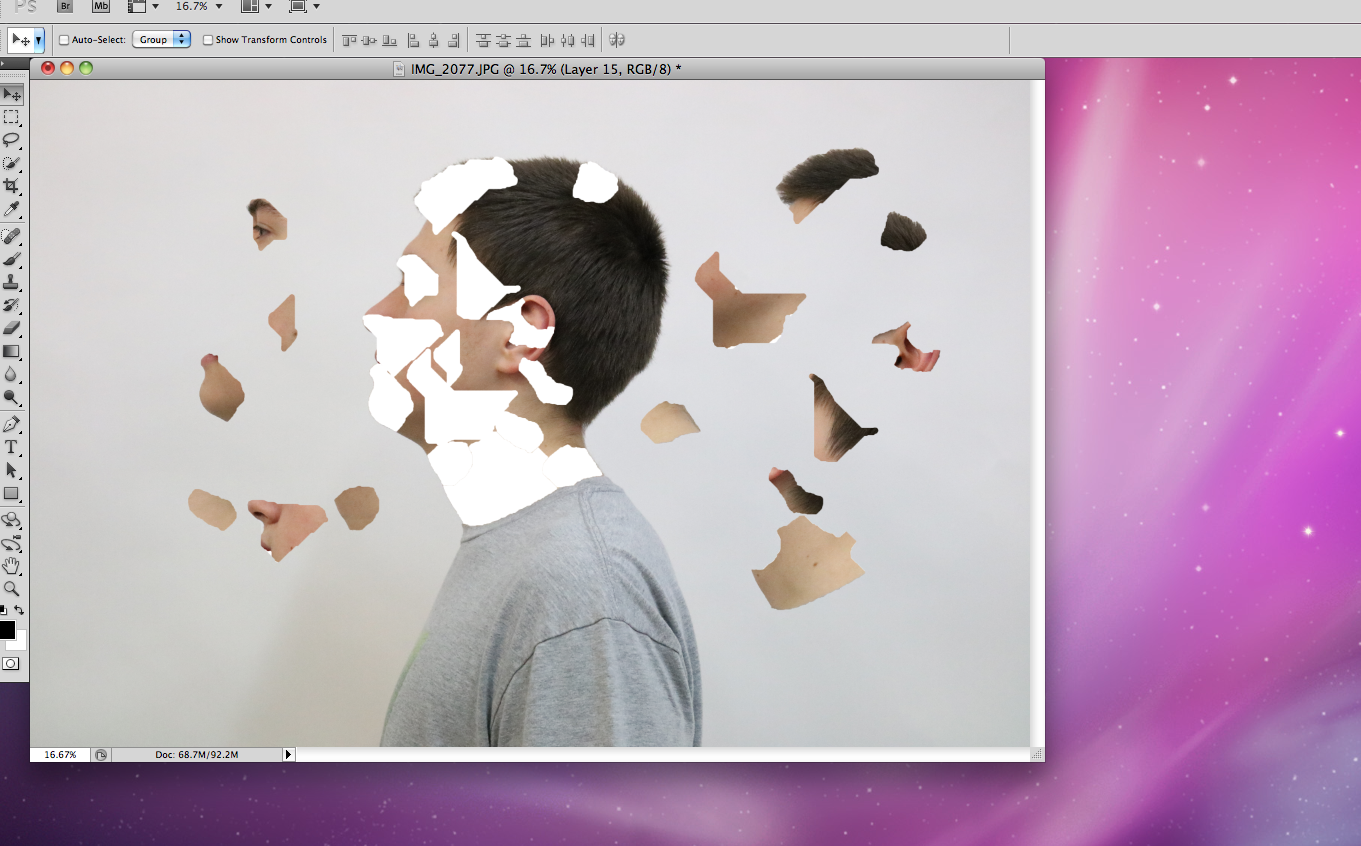
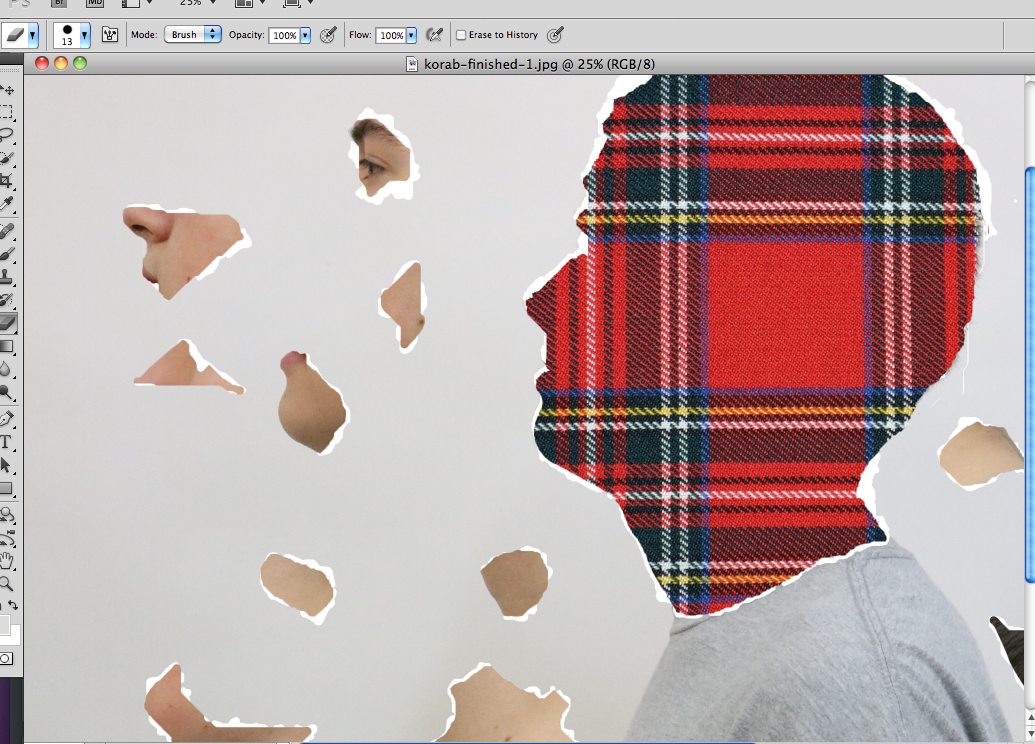
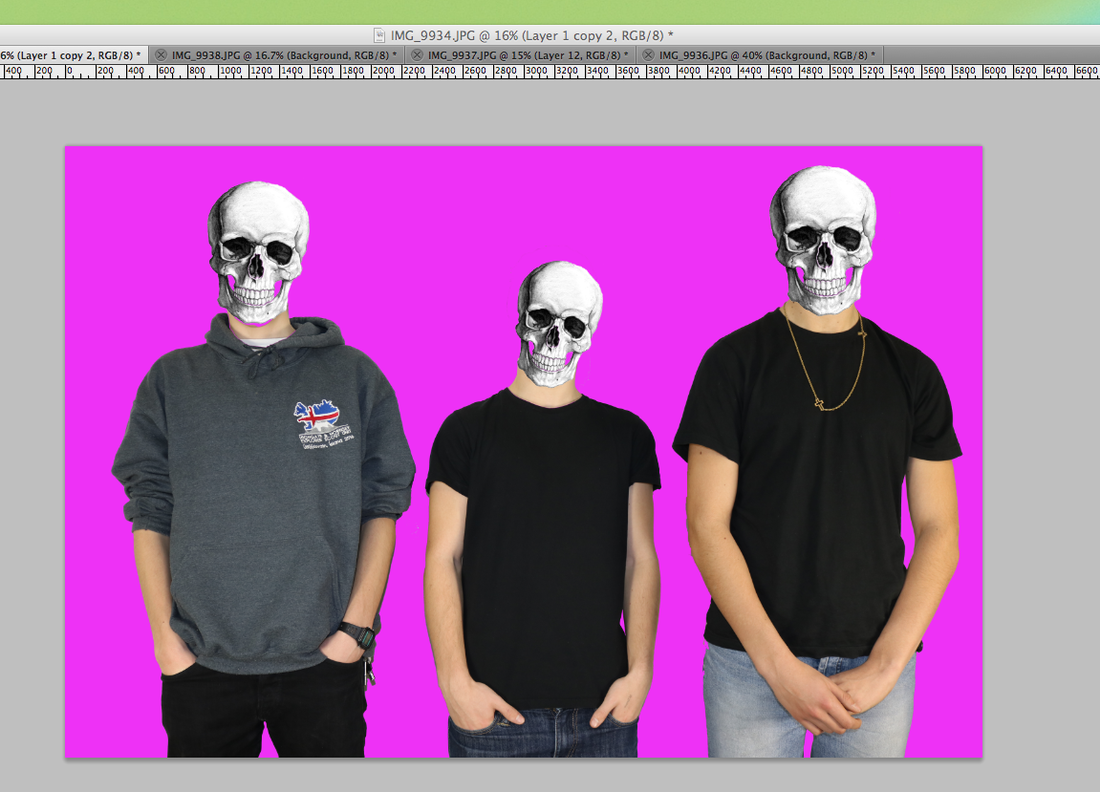
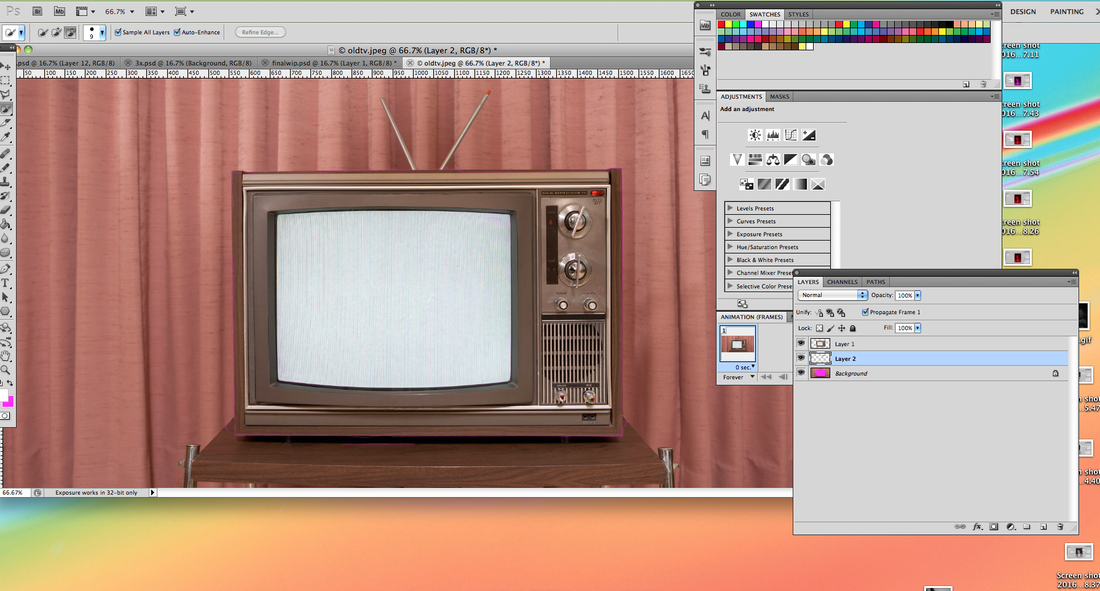
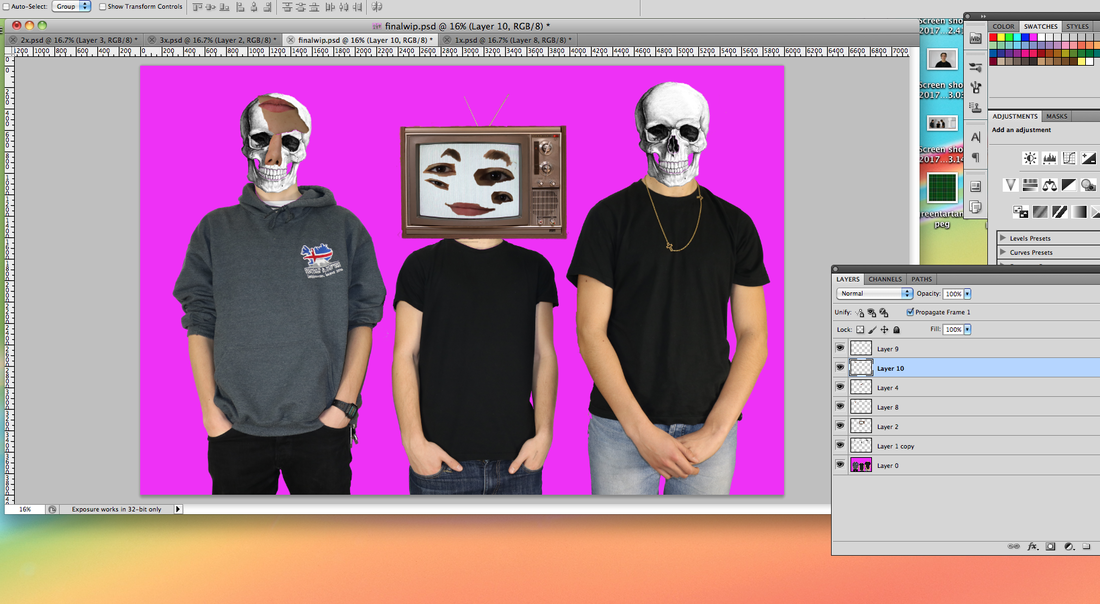
For my final piece I created an album cover that utilised the scrapbook aesthetic and use of portraits, that I had explored throughout the strand. To create the cover I used photoshop and an IOS app called R4VE. I used stickers from the to create trees, placing them on a solid pink background I made on photoshop. This formed the base for the entire image and served as the page of the scrapbook. I then took a series of portraits and dissected them in photoshop. I took random pieces of the portrait and separated them. I then used one group portrait as the basis for the rest of the cover. I removed the heads from this shot and replaced them with clip art skulls. I then pasted different fragments from all the different portraits over the skulls, while simultaneously adding stickers from R4VE to the heads of each person. Finally I used a font from the app to create the album title. I explored the themes of identity via abstracting the faces and replacing them with fragmented human images and contrasting objects that also reflect an aspect of identity (tv screen, helment).
I took influence from the Vaporwave and glitch art subcultural art styles that are prevalent on the internet. The trend of making fake album covers in this style is popular on both Reddit and 4chan music and art communities.
I took influence from the Vaporwave and glitch art subcultural art styles that are prevalent on the internet. The trend of making fake album covers in this style is popular on both Reddit and 4chan music and art communities.
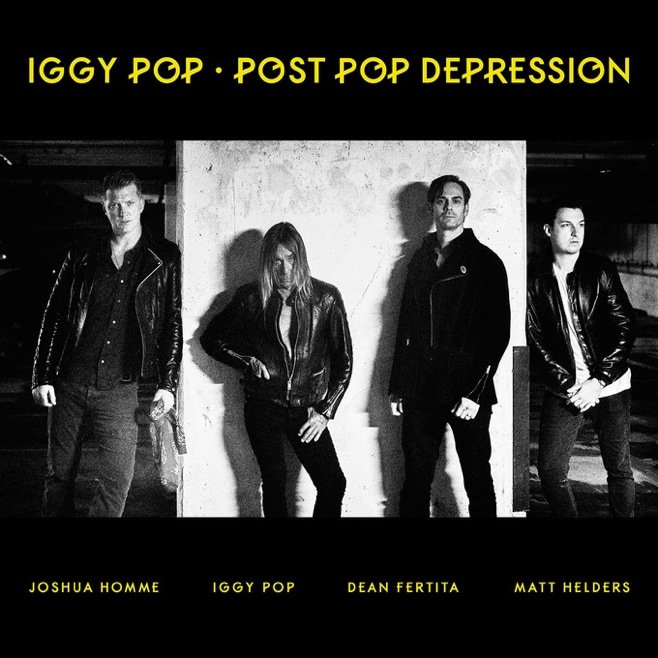
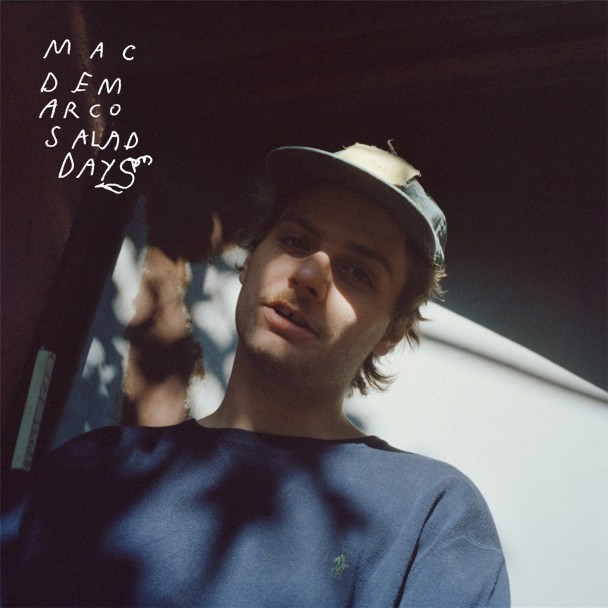
A major influence on this piece was the cover art for Iggy Pop's 2016 LP 'Post Pop Depression', the atmospheric group shot informed the overall structure of my final image. The tone and mood of the album is immediately established through the visual aesthetic of the cover art. The themes and structure of the image lend themselves smoothly to a vaporwave reinterpretation. I used a bright, warm colour palette in image but the imagery itself still retained the depressing themes and tonality.
Construction
|
|
|
|
